The Camera Shutter and Shutter Speeds
The function of the camera shutter is to expose the camera's image sensor to light coming through the camera lens when the camera shutter release is pressed. (the image sensor in today's digital cameras has replaced the film that was used in older cameras) The amount of time that the shutter is open or activated is called the shutter speed. The light that is gathered by the image sensor becomes the image or picture that will be saved on the camera's memory card.
Shutter Speed Chart: The most commonly used camera shutter speeds are usually expressed in fractions of a second as shown below. The "B" stands for Bulb and is a setting that the photographer can use to leave the shutter open as long as needed.
Camera Shutter Speed Full Stops
1/1000 1/500 1/250 1/125 1/60 1/30 1/15 1/8 1/4 1/2 1 Sec B
The shutter speeds listed above are some of the standard shutter speeds as full stops. Changing the shutter speed from any one of those settings to the adjacent one will either double or cut in half the amount of time the camera shutter remains open. (or the amount of time the image sensor is activated.
For example, a shutter speed of 1/125 will expose light to the image sensor about twice as long as the shutter speed of 1/250. On the other hand, a shutter speed of 1/125 will expose light to the image sensor about half the time as a shutter speed of 1/60.
Please note that, besides the shutter speeds listed above, you will see shutter speed increments in your camera that fall between the ones listed above.
Please note that, besides the shutter speeds listed above, you will see shutter speed increments in your camera that fall between the ones listed above.
How does the shutter speed affect the look of an image? The shutter speed that has been set in when a picture is being taken will primarily affect two things. Those will be the exposure of the image and the look of motion in an image.
The exposure of an image refers to whether the picture is too dark (underexposed), too light (overexposed), or just right for the photographer's preference. As far as the look of any motion in an image, the motion can be blurred or frozen.
First, take a look at the images below for examples of how the set shutter speed can affect the exposure of an image. The following section will show how the shutter speed affects the look of motion in an image.
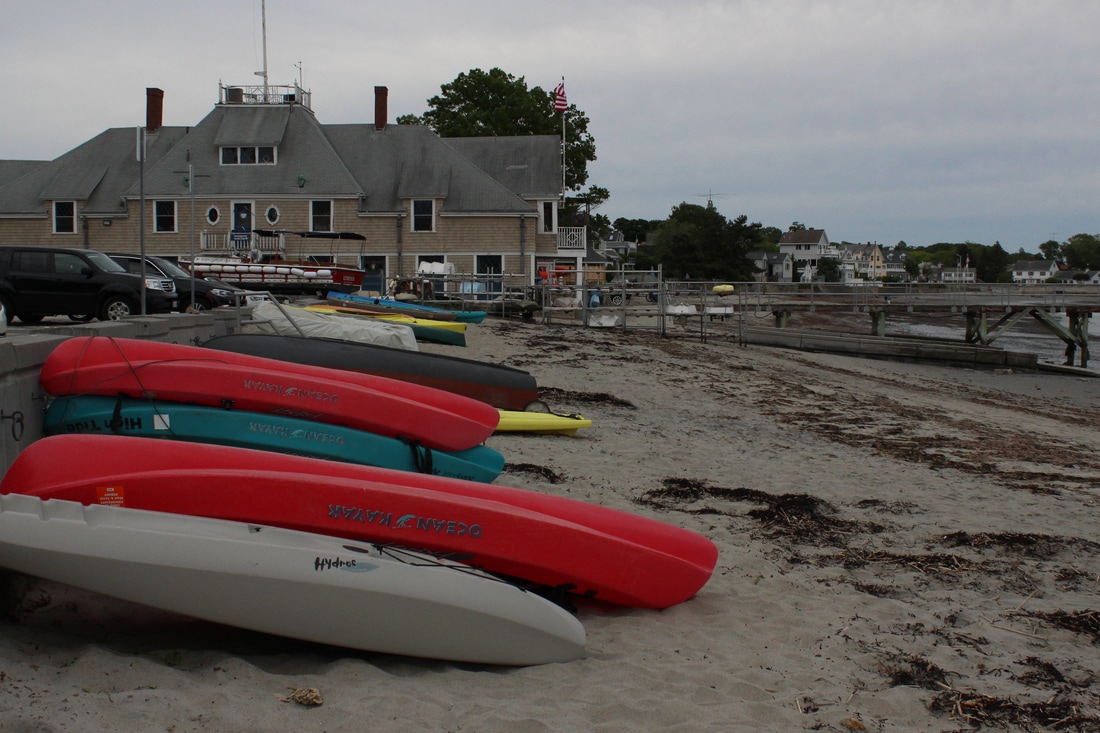
Image #1, Shutter Speed 1/250 Second, Aperture F11, ISO 800
|
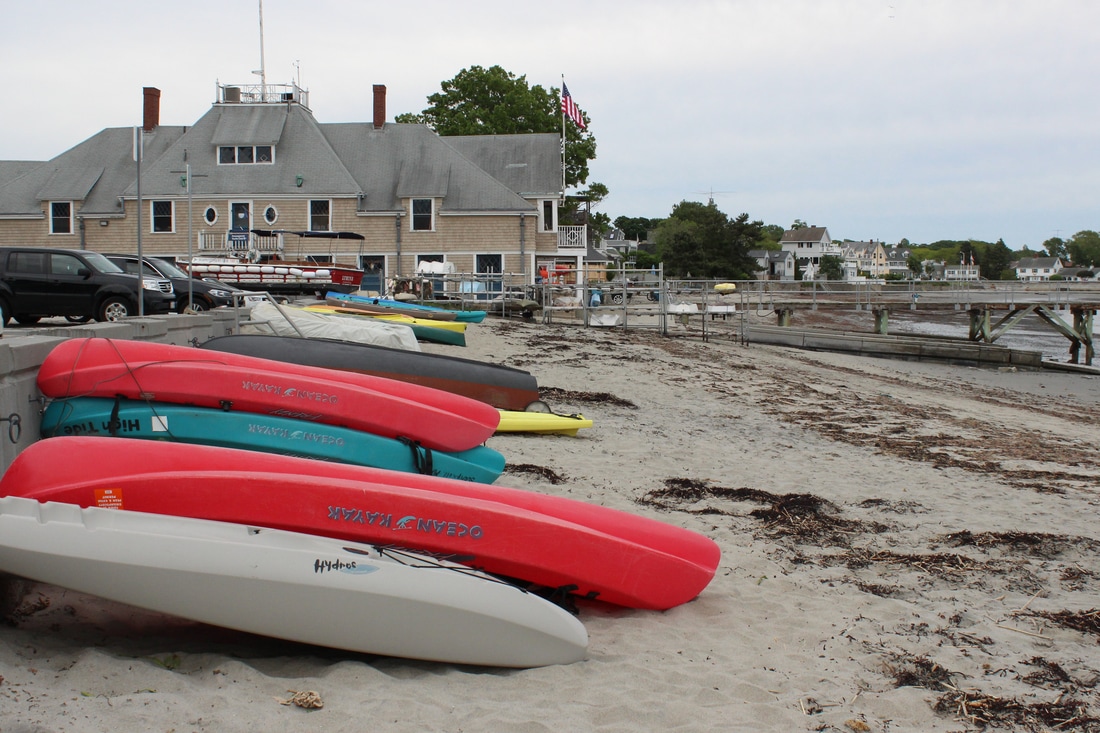
Image #2, Shutter Speed 1/125 Second, Aperture F11, ISO 800
|
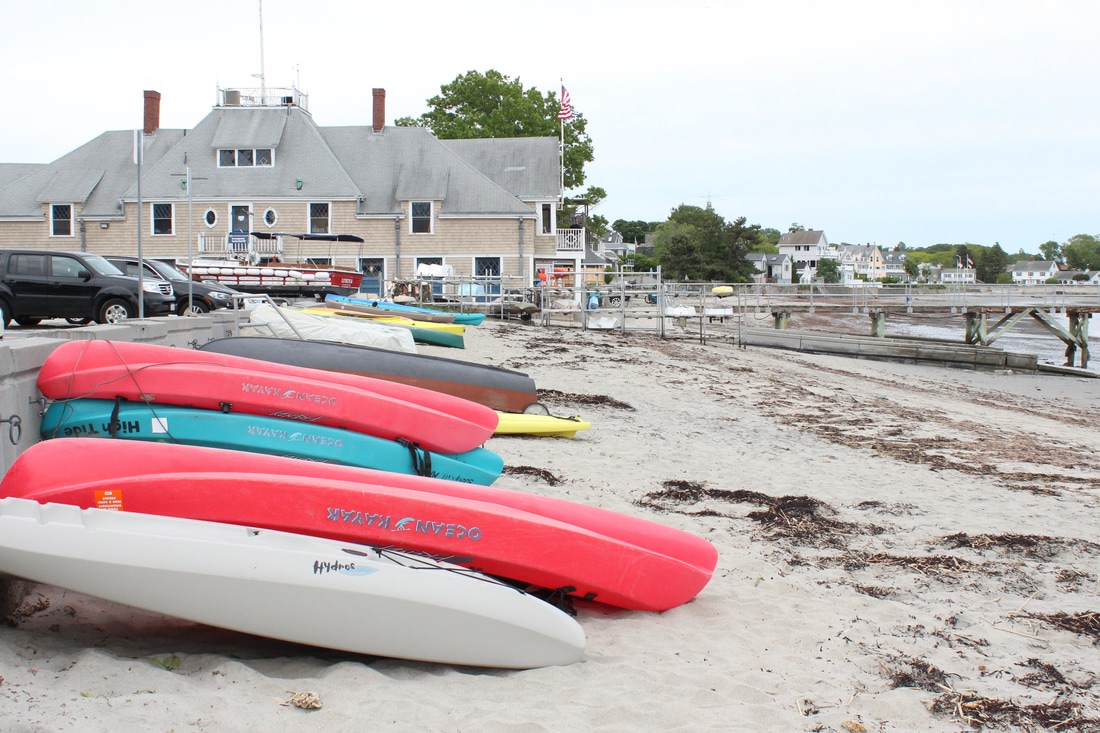
Image #3, Shutter Speed 1/60 Second, Aperture F11, ISO 800
|
The Camera Shutter and Exposure: The camera shutter, Lens Aperture, and Iso settings work together to produce images that are "correctly" exposed or exposed to the photographers preference. Those three functions are commonly referred to as the "Exposure Triangle". Check the Camera Exposure Basics page for more on how they work together.
Take a look at the three images above. All of the camera settings were the same except for the shutter speed. As you can see, image #1 which was taken with a shutter speed 1/250th of a second is darker than image #2 which was taken with a shutter speed of 1/125th of a second.
That is because the amount of time that light that was exposed the image sensor by the camera shutter at 1/250th second was about half the amount of time the light was exposed to the sensor at 1/125th of a second. Also, you can see that image #3 was taken with a shutter speed of 1/60th of a second and it is lighter than both of the previous images.
So, as far as the exposure of an image, the shutter speed settings can be adjusted so that the camera will produce lighter or darker images by increasing or decreasing the length of time that the image sensor is exposed to light.
Note: If you are using your camera in the auto mode, the camera will choose the shutter speed it is programmed to use for the scene you are shooting. Usually, it will be correct, but there may be times when you might need to manually adjust the shutter speed to obtain the correct exposure for your picture. (if possible with your camera)
Camera Shutter Speeds and Motion: In addition to allowing light to reach the image sensor, the camera shutter will affect how any motion in a scene will appear in your image. Motion in a photo can be "frozen" or appear as blurred. Take a look at the pictures of the 2 cars below.
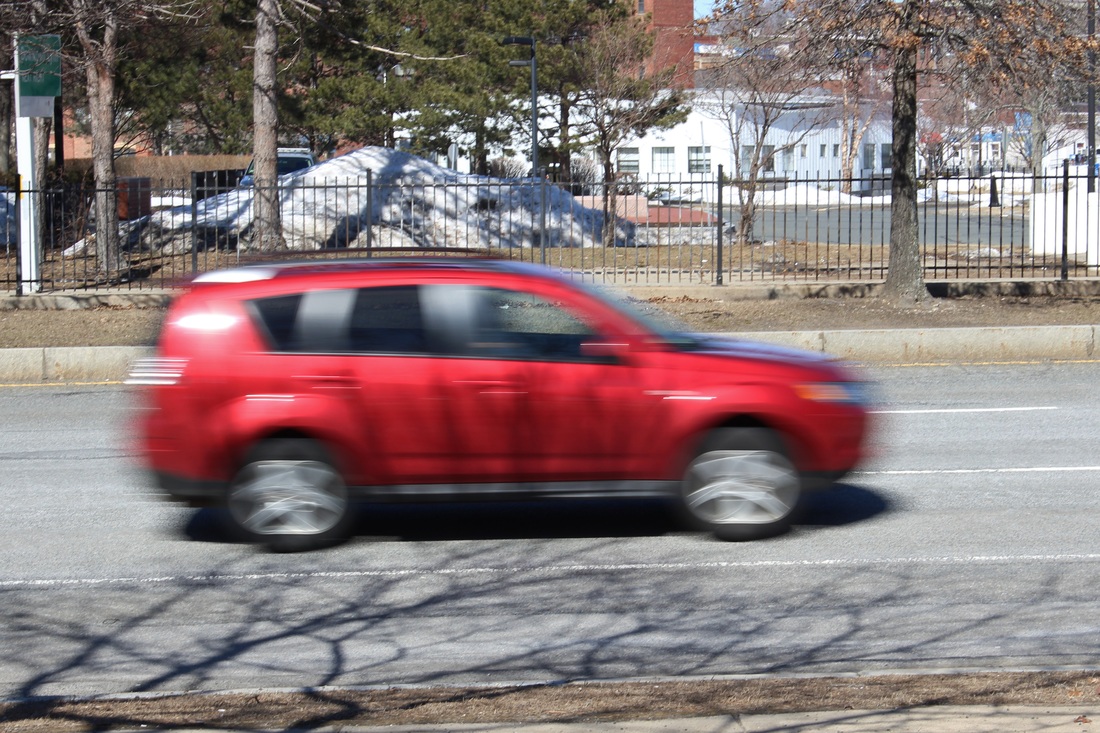
Image#4, Shutter Speed 1/60 second, Shows Motion Blur. F16, ISO 100
|
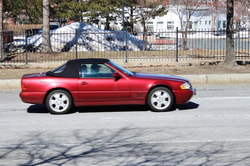
Image #5, Shutter Speed 1/400 second, Freezes Motion. F5.6, ISO 100
|
The car in picture #1 was moving around 30-35 mph. Notice that just about everything in the image is in focus except the car. This is an example of what is known as motion blur.
The car is not in focus because the shutter speed of 1/60 sec was not fast enough to "freeze" it's motion. In some cases this type of blur might be desirable because it actually conveys a sense of motion. However, if you want your moving subject to be in focus, you will need to use a faster shutter speed that will freeze the motion.
The car in picture #2 was also moving about 30 mph, yet the car and everything else in the scene is in focus. That is because in this case, a faster shutter speed (1/400 sec) was used. The shutter speed was fast enough to freeze the motion without the blur. The shutter speed of 1/400 worked well to freeze the motion in this case, but when taking pictures of faster moving subjects, a shutter speed of 1/500 or higher is usually a better choice.

Image #6, Shutter Speed 1/1000 second, ISO 100, F4.5
|
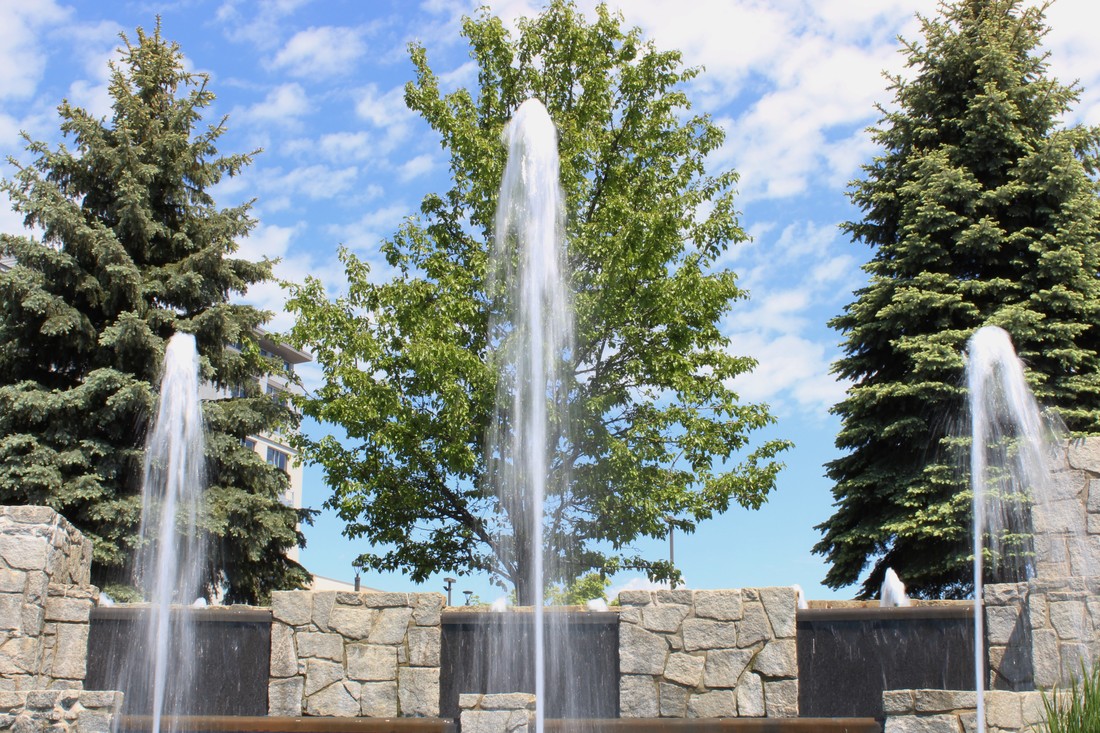
Image #7, Shutter Speed 1/15 second. ISO 100, F29
|
Another example of how the shutter speed affects the look of motion in an image is shown in the two pictures of the water fountains above. Image #6 was taken using a pretty fast shutter speed of 1/1000 second. As you can see, most of the water droplets are "frozen" in mid air.
On the other hand, image #7 was taken with a pretty slow shutter speed of 1/15 second and the water shows as a silky blur. You might see this effect commonly used in pictures of waterfalls. Both of the shutter speeds used were effective in creating nice images. The choice as to whether to use a very fast or slow shutter speed depends on the effect the photographer wants.
On the other hand, image #7 was taken with a pretty slow shutter speed of 1/15 second and the water shows as a silky blur. You might see this effect commonly used in pictures of waterfalls. Both of the shutter speeds used were effective in creating nice images. The choice as to whether to use a very fast or slow shutter speed depends on the effect the photographer wants.
Choosing a Shutter Speed: If you are shooting a scene with no motion and sufficient light (like a daytime landscape), the shutter speed becomes less important. However, you may need to adjust the shutter speed to obtain the desired exposure. (Take a look at images 1, 2 and 3 at the beginning of this tutorial for reference)
If you are hand holding the camera, try to use a shutter speed of 1/60th or faster to reduce the possibility of blur in the image due to camera shake. (It is possible to get somewhat sharp images handholding a camera using a shutter speed as slow as 1/30 sec, but not recommended) One person's hands might not be as steady as the next, and the result might be a not so sharp picture.
If there is motion in a scene that you are photographing, the best shutter speed to use will vary depending on the speed of that motion, or the desired effect of the motion. (subject frozen or blurred)
Take a look at the shutter speed reference chart below for suggestions on shutter speed starting points for commonly photographed subjects or scenes. (these are called starting points because the amount of available light in a scene may vary and you may have to adjust the shutter speed to obtain a correct exposure)
Then, take a look at the example images below the shutter speed reference chart.
Then, take a look at the example images below the shutter speed reference chart.
Shutter Speed Reference Chart
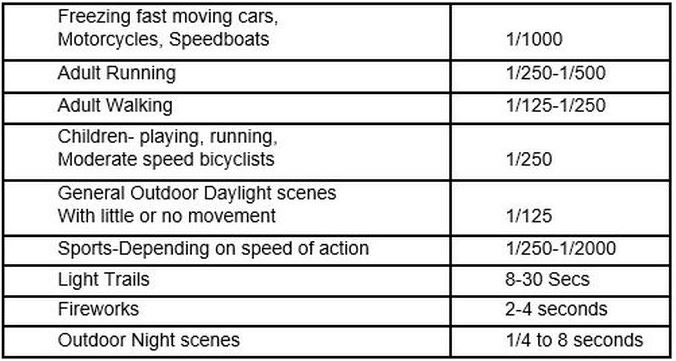
If your image is coming out overexposed or underexposed using the desired/chosen shutter speed, you can always change the camera aperture setting or the camera ISO to get the desired exposure. Check the Camera Exposure Basics article for more on how to use the "Exposure Triangle"
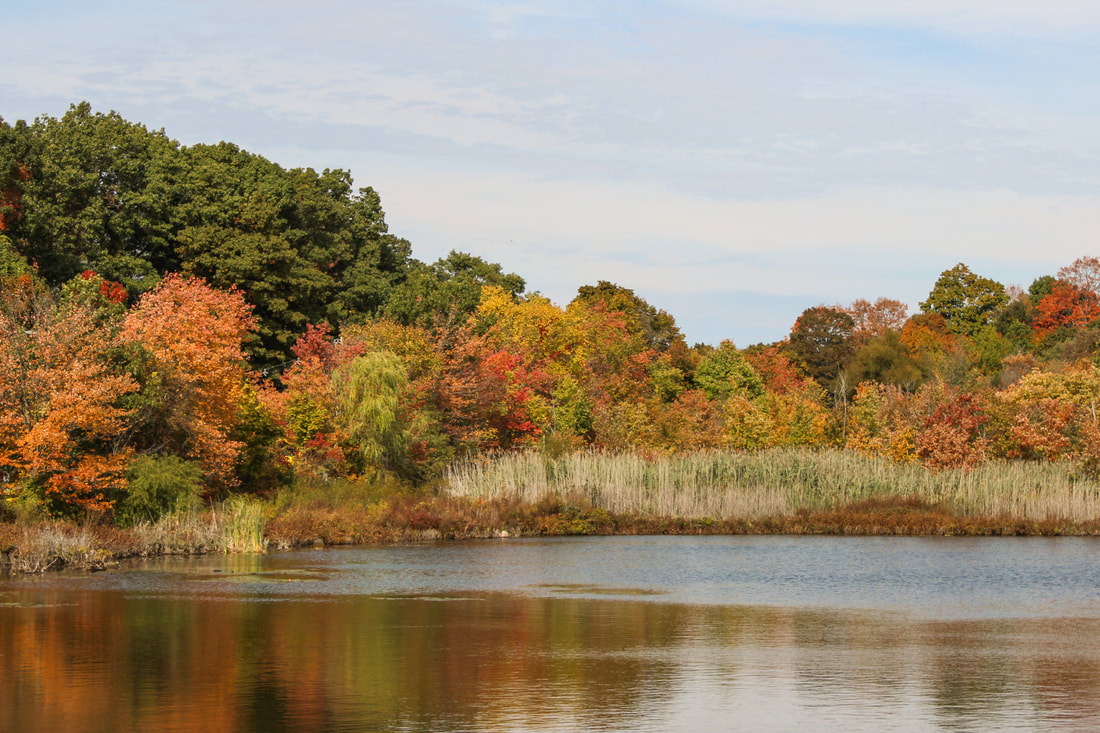
Image #8, 1/200 sec, ISO 100, F10
|
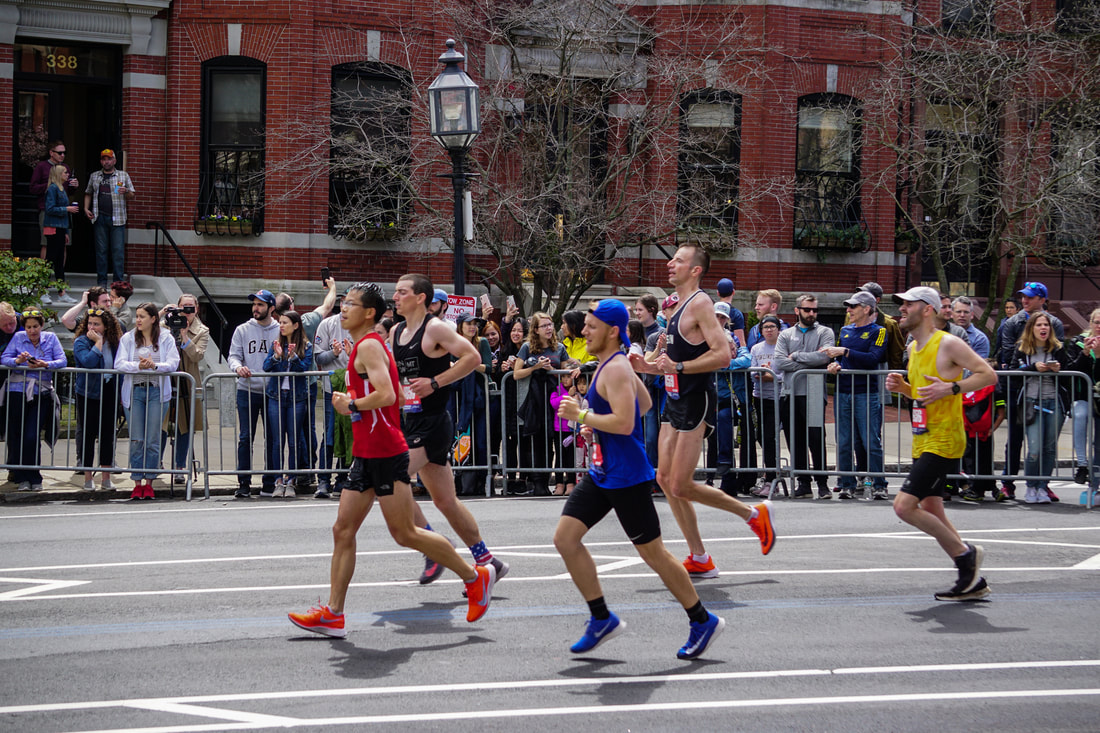
Image #9, 1/500 second, ISO160, F4.5
|
Landscape image #8 above was taken using a shutter speed of 1/200. However, it could have also been taken with a slower shutter speed and an adjustment to the ISO or aperture setting,*
*Depending on the available light, adjustments to the lens aperture and ISO settings may be required to use the desired shutter speed. Check the Camera Exposure Basics tutorial on how adjustments may be made.
*Depending on the available light, adjustments to the lens aperture and ISO settings may be required to use the desired shutter speed. Check the Camera Exposure Basics tutorial on how adjustments may be made.
Image #9 above shows marathon runners. The movement is frozen because the shutter speed used was 1/500 second. As suggested in the shutter speed reference chart, a shutter speed of 1/250th would have worked as well.
Use a Tripod for Slower Shutter Speeds: It is important to note that when you use very slow shutter speeds, (1/30 second or slower) it is a good idea to use a Tripod. Camera shake and the blur that comes with it increases greatly at slower shutter speeds. When the camera is hand held and a very slow shutter speed like 1/15 second is used, there is a strong possibility that the whole image will be out of focus due to camera shake.
There are times when a slow shutter speed is more desirable or necessary, especially in low light situations and at night. The pictures of the fireworks display and the car light trails below are classic examples of situations that require a tripod.

Image #10, Shutter Speed 4.0 Seconds, F1.8 ISO 125
|
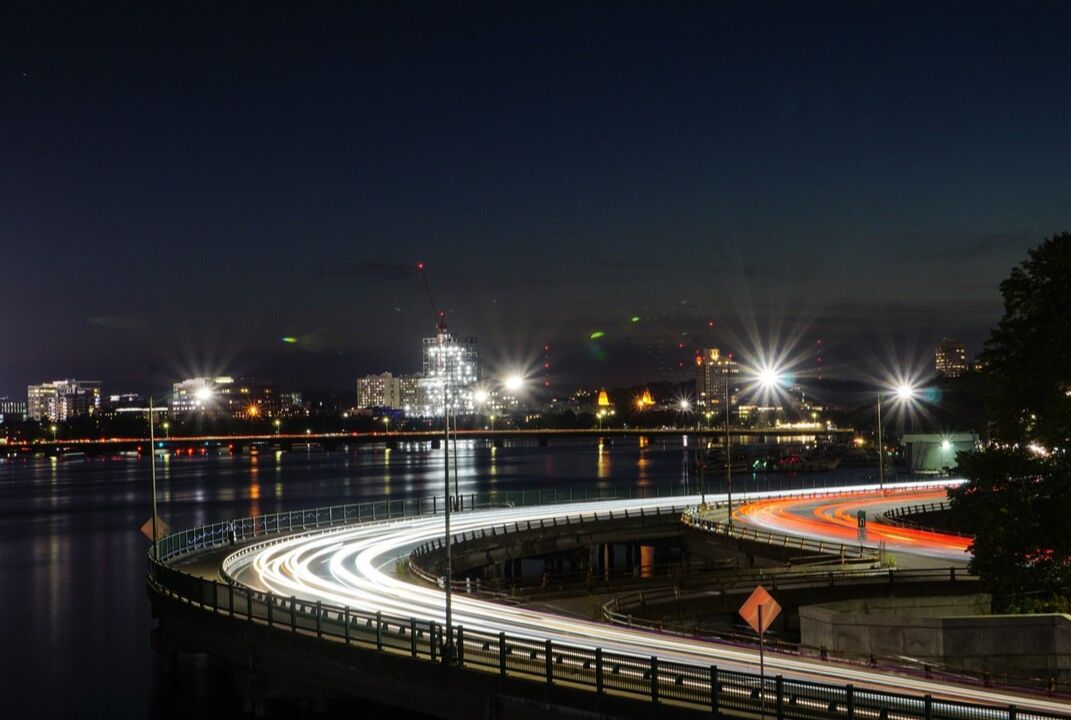
Image #11, Shutter Speed 15 Seconds, F14, ISO 100
|
As you can see, the shutter speeds used were 4 seconds and 15 seconds respectively. It is impossible to get a sharp, clear image when the camera is hand held at those shutter speeds. So a tripod is a necessary investment if you want to take sharp pictures at night. Check out the variety of Tripods available at Amazon and find a sturdy one that will fit your budget.
If you are using a Digital SLR camera, like the Canon EOS Rebel T7i, you will be able to set the shutter speeds manually. You will also be able to manually set the camera shutter speed if you are using an advanced compact camera like the Sony DSCH X80 or any of the new Mirrorless Compact System Cameras.
Many of the newer smart phone cameras now have the option for you to use simple manual exposure settings. Check your camera phone manual for more details.
All of the cameras that were just mentioned also allow you to manually set the lens aperture, ISO setting, and many other features so that you have more creative control over your pictures.
If you are using a very basic compact camera, you probably wont be able to manually adjust your shutter speed. However, basic compact cameras have automatic scene modes that can be set to match the type of scene you are photographing.
The camera will automatically set the best shutter speed for that type of scene. Please see the tutorial on Automatic Shooting Modes for a little more on that subject.
The way each type of shutter works can get pretty technical and it is not necessary to know the full details of exactly how they work. Just rest assured that more than likely, any of todays camera shutters will work well for an average photographer who is not working on some type of specialized or professional project.
Types of camera shutters: Todays digital cameras come equipped with mechanical shutters, electronic shutters or a combination of both. (Many Mirrorless cameras have a combination mechanical/electronic shutter) Mechanical shutters have physical parts that open and close to expose the image sensor to the light coming through the camera lens.
Technically, electronic shutters are not shutters at all. An "electronic shutter" does not have any moving parts but the image sensor will be electronically activated for the set shutter speed time when the shutter release button is pressed. Smart phone/cell phone cameras have electronic shutters. That is because smartphone/cellphone cameras are too small to have the additional needed parts of a camera shutter built in to it.
When you press the shutter button on a cell phone, you might hear a clicking sound that might seem to indicate that the shutter has opened and/or closed to take the picture. However, that is an electronically generated sound that can be turned on or off at the photographers will.
The way each type of camera shutter works can get pretty technical and it is not necessary to know the full technical details of exactly how they work. Just rest assured that more than likely, any of todays shutters will work well for an average photographer who is not working on some type of specialized or professional project.
Hopefully, you now have a good understanding of the camera shutter function. Practice using the various shutter speeds to fit the situation, then add your own creativity. Your pictures should be fine!