Taking Pictures of Sunsets and Sunrises
The vivid colors in pictures of sunsets and sunrises can produce some of the most spectacular images that you may photograph. As beautiful as they are, they are not too difficult to capture.
Caution: Remember that you should never stare directly at the bright sun, even through the camera viewfinder. It could cause permanent eye damage.
The following are some tips that can help you get started taking beautiful sunrise and sunset pictures.
Make a Plan. You will rarely just by chance find yourself in the right place at the right time to photograph a beautiful sunset or sunrise. There might be something blocking the best view, or the sun will be setting "over there" when you are "over here"
Take note of the approximate time the sun sets or rises in your area. Then choose a location where you can get an unobstructed view of the sky, horizon, or whatever you want included in your sunset and sunrise pictures.
Arrive earlier than the time of the actual sunset or sunrise on the day you plan to take your pictures. Remember that the most spectacular colors and tones last for only about a half hour during the entire sunset or sunrise.
Sunset/Sunrise Image #1, F5.6, 1/250 Sec, ISO 100
|
Sunset/Sunrise Image #2, F 5.6, 1/20 Sec, ISO 100
|
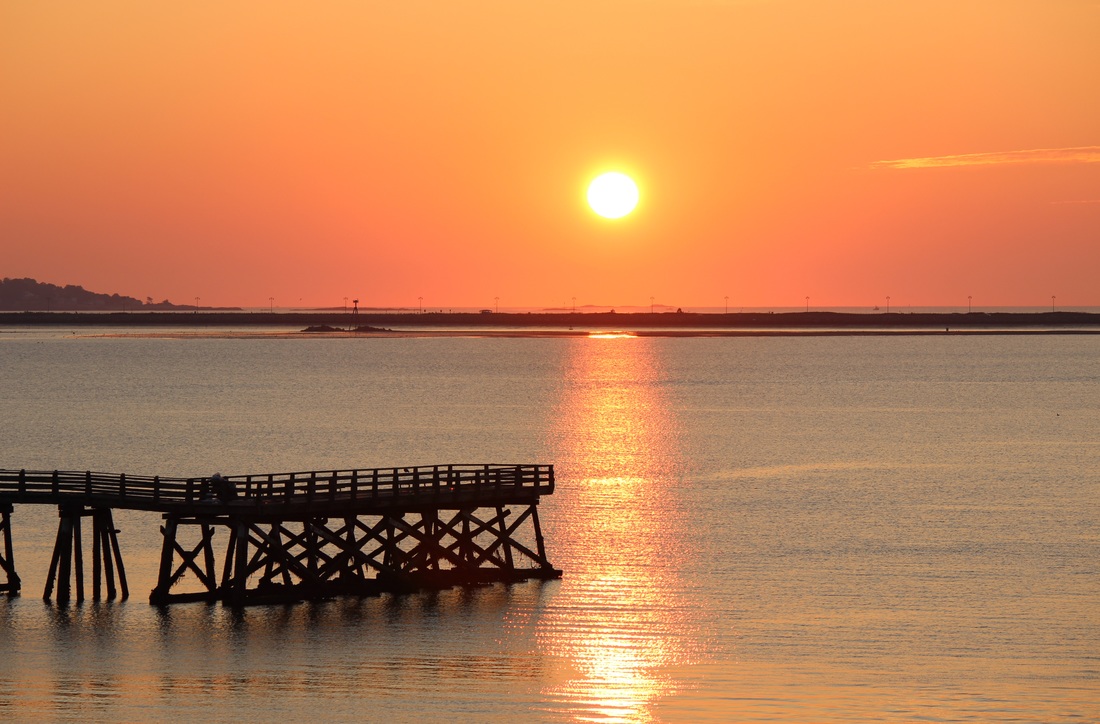
Take pictures before, during, and after the sunset/sunrise: Taking a nice picture of the sun when it is just above the horizon similar to image #1 is great. However, you should not wait until the sun has risen above the horizon to start taking sunrise pictures.
Neither should you stop taking pictures immediately after the sun has disappeared below the horizon in the case of a sunset.
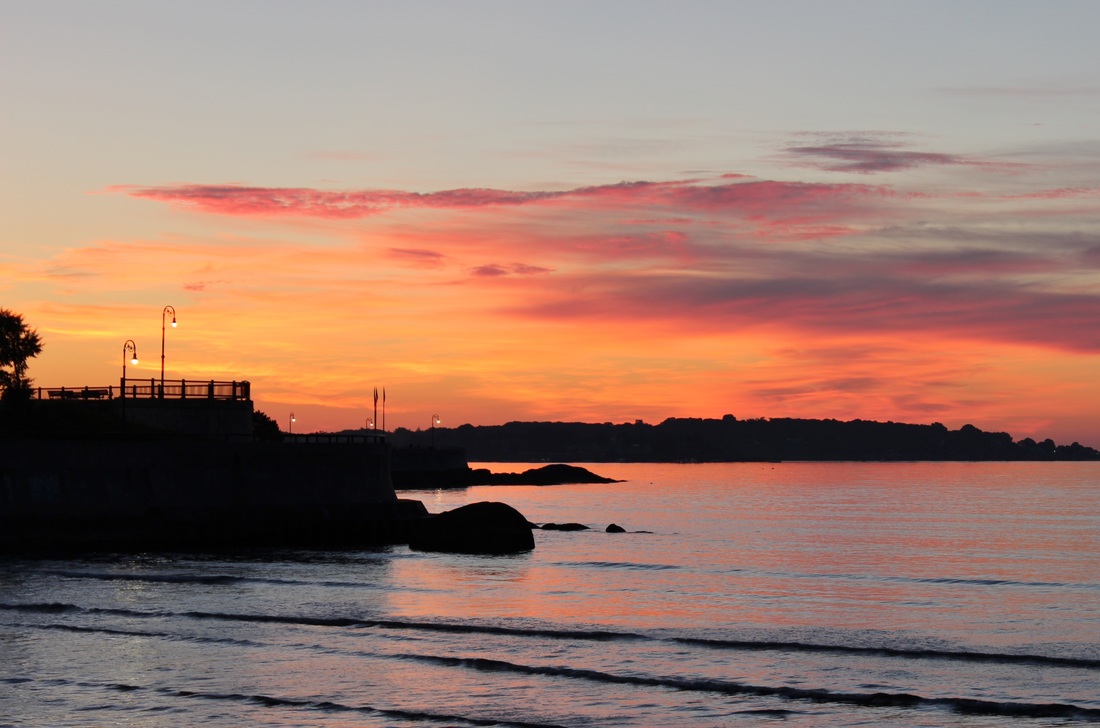
You will find beautiful rich tones and colors in the sky for a short period right after the sun sets below the horizon,or before it begins to appear above the horizon during a sunrise.
For example, picture # 2 was taken about 10 or 15 minutes before the sun began to appear on the horizon.As you can see, there are some very interesting colors and tones in the image even without the sun being in the scene.
Tips for Composing your Sunset/Sunrise Pictures: Beaches, plains, and wide open areas are the best places to take sunset and sunrises pictures. While sunset or sunrise pictures taken at a beach or with some body of water included might be some of the most popular scenes, distant mountains or even buildings with the sun setting around them can also be great shots.
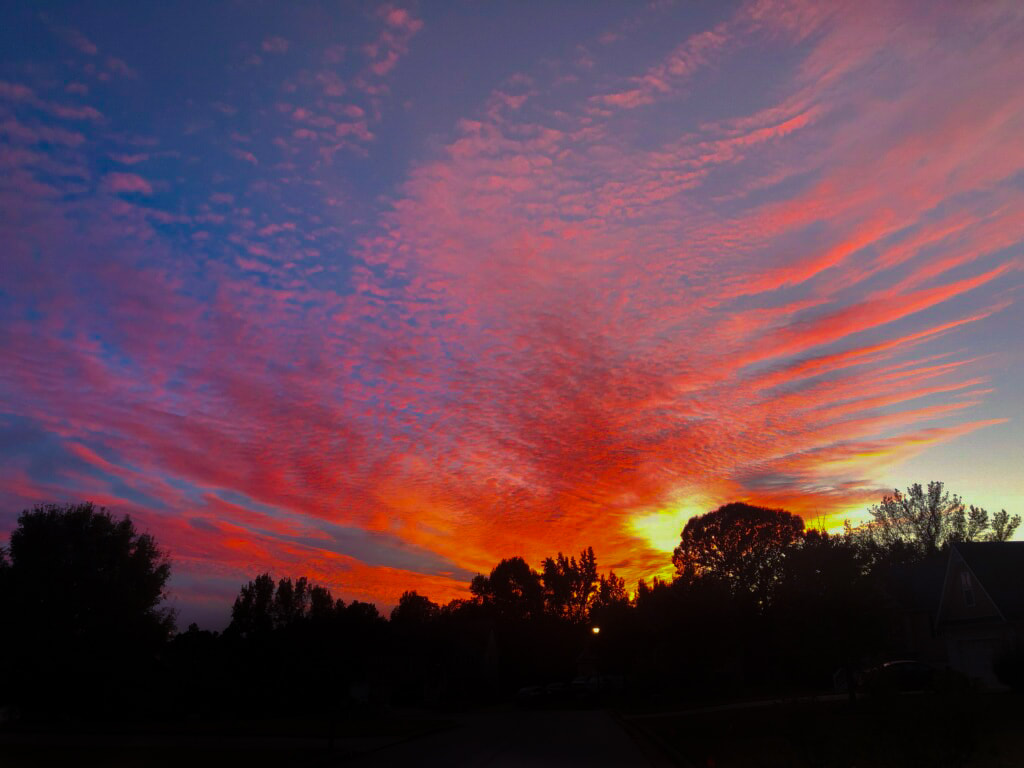
If there are clouds in the sky when you take your sunrise or sunset pictures, they will usually make the image very interesting. Clouds can be wispy, puffy, or scattered. No matter which type are there when you are taking the pictures, the sun's rays reflecting off the clouds will produce different tones and colors among the clouds.
If you want the sun to be the primary focus of your picture, zoom in or use a telephoto lens to make it more prominent. However, due to the brightness and intensity of the sunlight, zooming in too close could cause the sun and the area around it to be way overexposed and washed out.
Try to resist the urge to place the horizon line directly in the center of the frame when you are taking pictures of sunsets or sunrises. If you want to emphasize the sky, place the horizon line somewhere around the lower third of the frame. If you want to emphasize something like reflections of the sun on water, try placing the horizon closer to the upper third of the frame.
No matter where you place the horizon line, try to keep it as level as possible. A slanted horizon usually doesn't look natural. Also try placing the sun in various positions that are not in the dead center of the frame. (if the sun is included in your picture)
The tips about where to place the horizon line and the position of the sun in your sunrise or sunset pictures is part of the principle of the Rule of Thirds. Check the Basic Picture Composition tutorial for more on this subject.
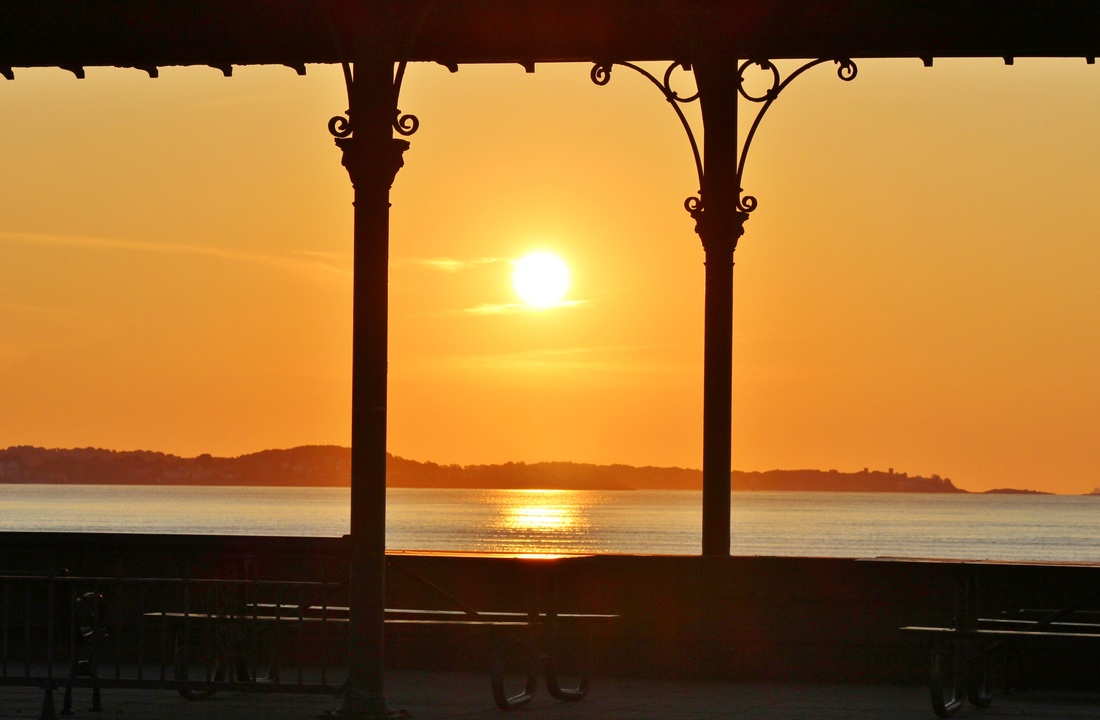
Sunset/Sunrise Image #3, F10, 1/200 Sec, ISO 100
|
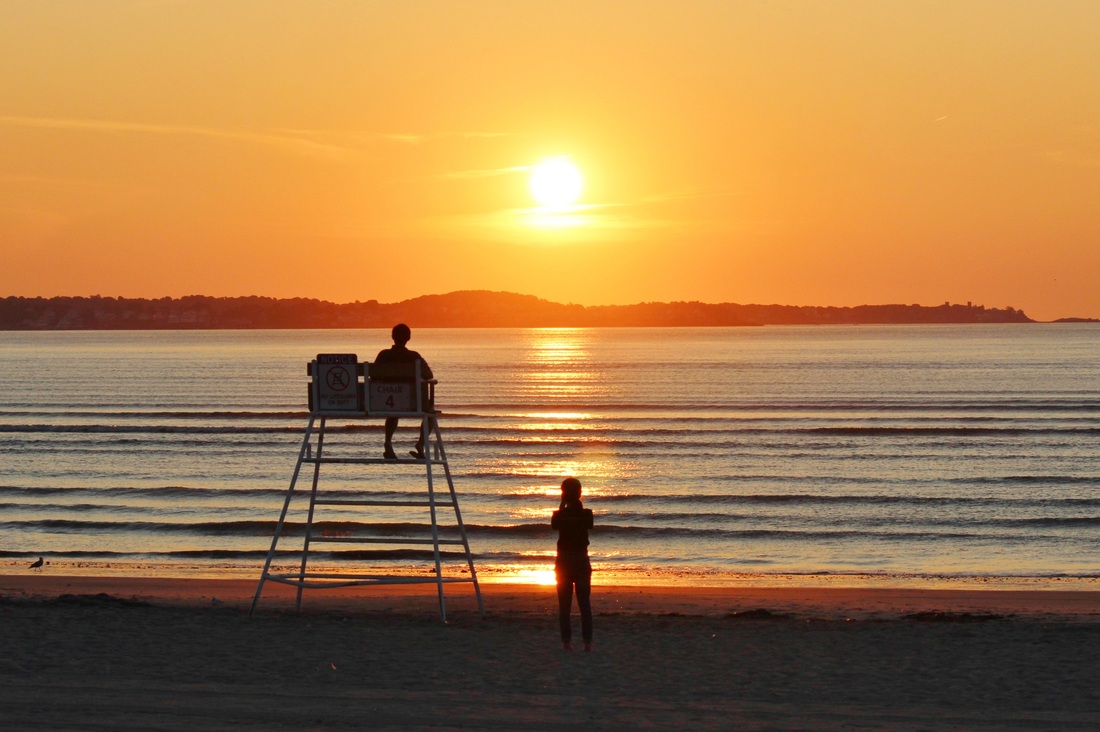
Sunrise/Sunset Image #4, F10, 1/640 Sec, ISO 400
|
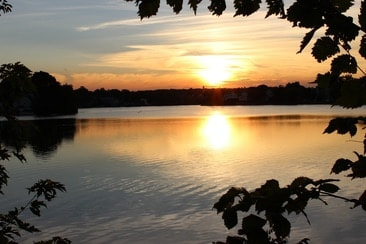
When taking sunrise or sunset pictures, try including things like trees, birds, or even people in the foreground or background as silhouettes. This can add a little more interest to the overall picture. For instance, picture # 3 uses the tree branches as sort of a partial frame. Picture #4 has 2 people in the foreground that show as silhouettes.
All sunrise and sunset pictures don't have to be taken in the direct path of the sun. Look to the left and right of the areas around the sun. Even when it is not included in your picture, the sun emits a warm glow that can make even ordinary scenes or objects around it appear more interesting.
Hopefully, some of your sunset and sunrise pictures (or any other type of pictures) will look like a work of art. You might want to have them enlarged into Canvas Prints so that they can be viewed as part of your home decor or as wall art. Canvas prints are available at Canvas Discount.com.
Camera Exposure Settings. One good thing about photographing sunsets and sunrises is that there is not a "one size fits all" correct exposure setting. The strength of the light can change every couple of minutes as the sun begins to set closer to the horizon or rises above it. Whether the sky is clear, or partially cloudy will also affect the exposure settings.
The exposure settings used for the pictures on this page are listed below each of the images to give you a broad idea of what settings might be used for sunset/sunrise pictures.
It is important to know that pointing the camera at the sun or a bright sky will always underexpose all or most of the darker areas of the scene. However, when it comes to sunset and sunrise pictures, dark underexposed areas in the scene may create a nice contrast with the brighter colors in the sky as you can see in picture #5.
Also, depending on the strength of the light, objects in the scene may be rendered as dark, almost black silhouettes as shown in picture #6.

Sunset/Sunrise Image #5, F6.3, 1/80 Sec, ISO 100
|
Sunset/Sunrise Image #6, F13, 1/800 Sec, ISO 400
|
Since many sunset and sunrise pictures are under exposed, it may appear that it was darker than it actually was when the pictures were taken. Take a look at picture #7. Areas of the lower portion of the image and the foreground tree branches are somewhat dark. Yet the sky is light.
So don't think that if it still seems kind of light outside that you can't some pretty good shots. As long as the sun is hovering around the horizon, there will be some warm deep colors in your sunrise and sunset pictures.
The best way get started taking your sunset/sunrise pictures is to take a test shot in the automatic or a semi-automatic mode. If your picture is too light or too dark, use your camera's Exposure Compensation EV+- feature to quickly lighten or darken your image. Try not to lighten scenes with the sun included by too much. You may "blow out" (overexpose) the sun and the area around it.
 Sunset/Sunrise Image #7, F9, 1/250 Sec, ISO 100
If you are using a basic compact camera like the Sony DSC W830, you will not be able to manually choose specific lens aperture and shutter speed settings.
However, using the exposure compensation feature will cause the camera to automatically choose lens aperture and shutter speed settings that will lighten or darken your images.
Additionally, if you use the camera's sunset/sunrise shooting mode, the camera will choose settings that will enhance the warm color tones in the scene.
If you will be taking pictures with a Digital Slr camera similar to the Canon T7i, using the camera's semi-automatic ("P") Program Mode might be an option to consider.
That way you can let the camera choose the lens aperture and shutter speed settings while you concentrate on composing the scene in the best way possible. You will still be able to control just about all of the other camera features and settings while in the Program Mode.
However, if you feel that manually setting the lens aperture or shutter speed would work better for what you are trying to accomplish, then by all means use your Manual, Aperture Priority, or Shutter Priority mode.
Don't forget that the ISO number is part of the equation when you are setting exposure values. It is a good idea to start out by using a lower ISO number such as ISO 100 or 200. Those settings should keep the digital camera "noise" in your images to a minimum. Use the higher ISO numbers like ISO 800 and above only when necessary.
Check the Camera Exposure Basics tutorial for an explanation about how shutter speeds, aperture settings and ISO work together to produce good exposures for your images.
If you are the creative type that likes to change, adjust, correct, or fine tune the colors and shades in your pictures, photo editing software like Adobe Photoshop Lightroom 6 would work well for you.
 Sunset/Sunrise Image #8, F6.4,
1/110 Sec, ISO 100
Sunset/Sunrise Image #8, F6.4,
1/110 Sec, ISO 100
Should you use a Tripod? Generally, sunset or sunrise pictures taken when the sun is above the horizon won't require you to use a tripod. The light from the sun is so strong that relatively fast shutter speeds (1/60 Sec. or higher) can be used. That will decrease the chance of blurred pictures due to camera shake.
However, when the sun is below the horizon, or not included your picture, the intensity of the light will be much weaker. In those cases, check the shutter speed that you are using. If it is less than 1/60 second,you might need to use a tripod to avoid blurred pictures.
If you don't have a tripod, try using a higher ISO setting.This will allow a faster shutter to be used and you might still be able to hand hold the camera without getting blur from camera shake in your sunrise/sunset pictures.
Focusing. Usually focusing shouldn't be too much of a problem. Just let your camera use its automatic focusing mode. However, sometimes the auto focus will not work when you point at the sky. In that case, focus on a distant object instead of the sky.
White Balance: Sometimes you might notice that the colors you see on your camera's LCD screen are not as deep or vivid as what you see with your eyes. In those cases try changing your camera's White Balance setting to cloudy or shade. That setting will make the color tones in your images warmer.
Hopefully, you can now get you started on the road to taking some great sunset and sunrise photos. Just like everything else in life, it might take a little practice. One thing you can be sure of is that the sun and elements of the atmosphere will provide you with an unlimited variety of colors and tones to take pictures of every day.