Outdoor Christmas Lights/Holiday Lights Photography
Just as sure as the winter holidays roll around every year, you can be sure that you will see beautiful light displays outdoors around houses, in downtown areas, and many other places. You can get some pretty good shots of Christmas lights with just about any type of camera. It doesn't make a difference if you use a Compact Camera like the Panasonic Lumix DC-ZS70k or a Digital SLR camera like the Canon T7i. You can even take pictures of holiday lights with your smartphone.
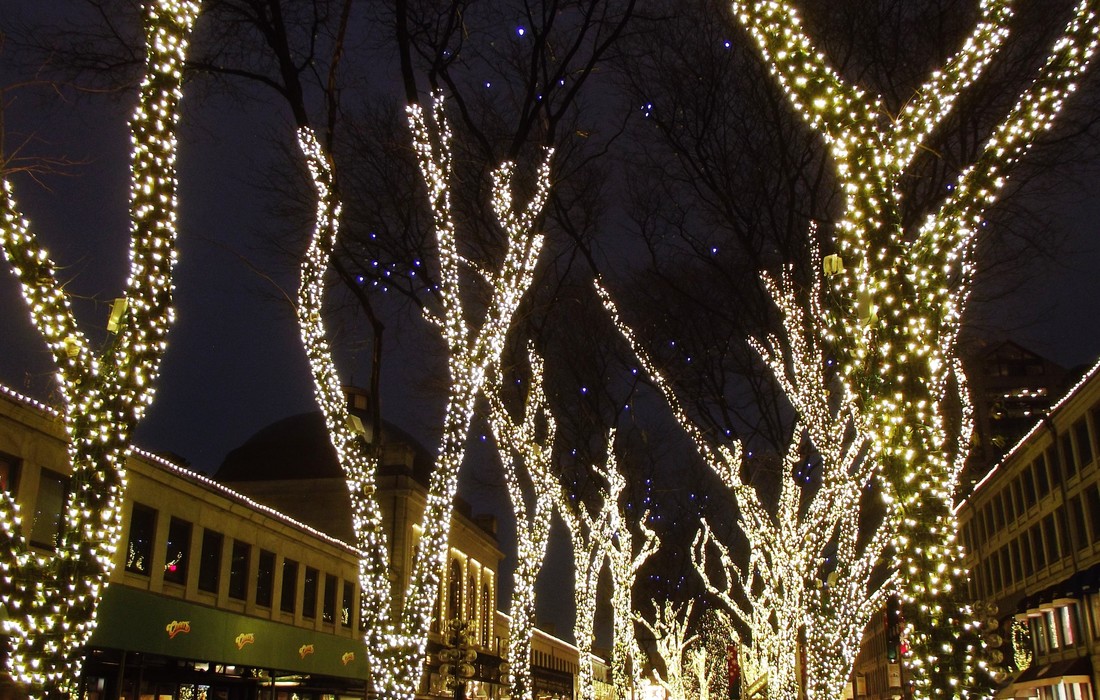
Holiday Lights Picture #1, 3/10 Sec, F3.1, IS0 100
|

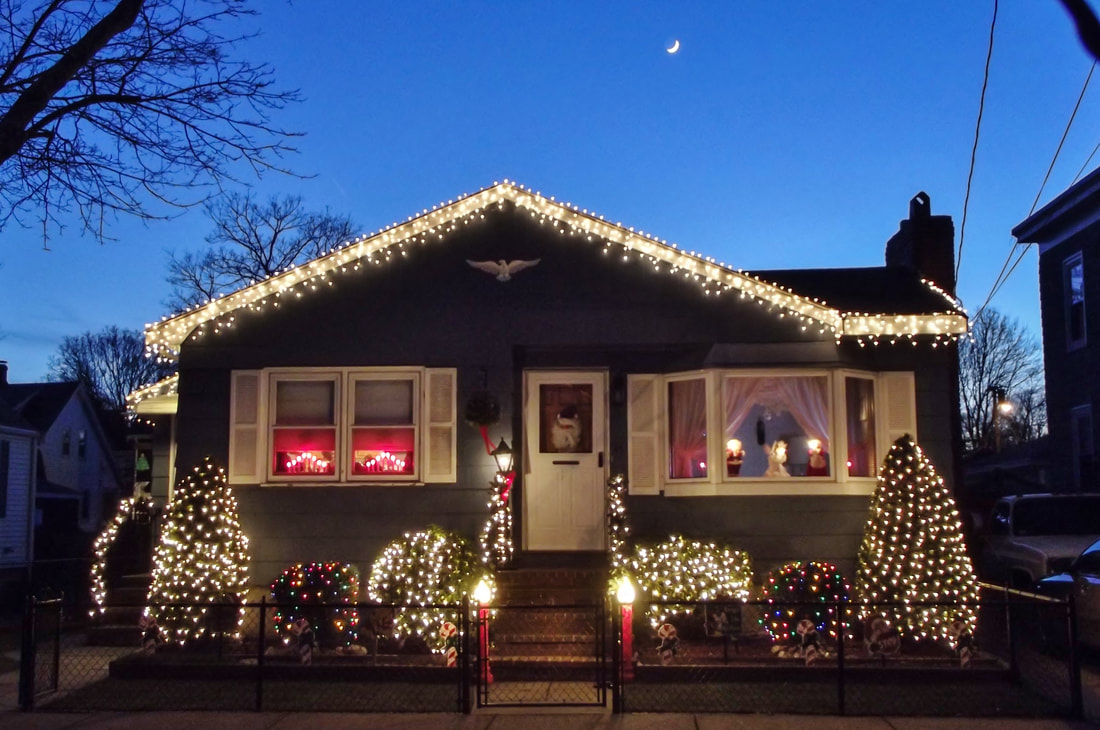
Holiday Lights Picture #2, 1/20 Sec, F4, ISO 1600
|
There are a few important things you should be aware of when taking pictures of outdoor holiday light scenes so that you will get results similar to those shown above. First, the amount of natural and ambient light available when the pictures are being taken is a big factor. The camera exposure settings, especially the camera shutter speed are also important.
Best Time to Take Pictures of Holiday Lights: The time of day/night that you take your Christmas/Holiday lights pictures will have a definite impact on the look of your pictures. Most people start taking pictures of outdoor holiday lights when it is pretty dark outside.
However, that is not necessarily the best time to get great shots of holiday lights. A good time to start taking pictures of holiday lights is during twilight. That is the time period when the sun has set, but before total darkness sets in. During that time period it is dark enough for the lights to stand out, but there will still be just a touch of lingering daylight in the atmosphere. That bit of light will make it possible to show more details of the overall scene in addition to the holiday lights.
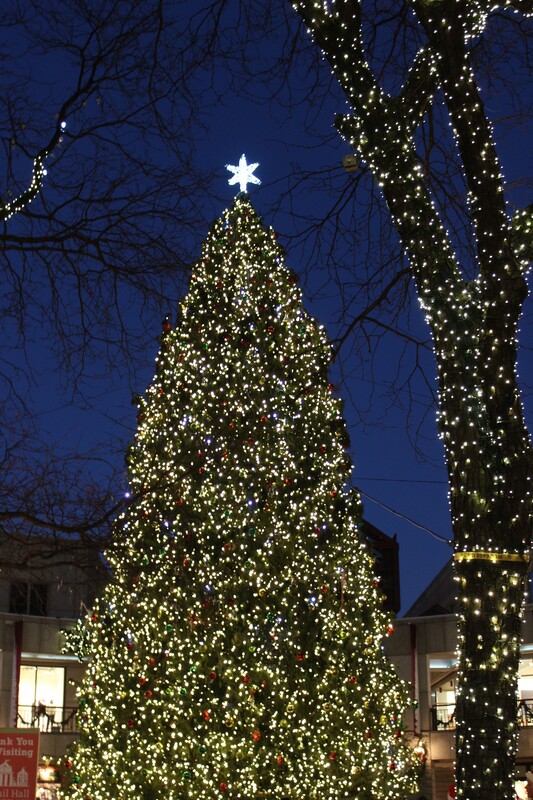
Take a look at picture #3 below. It was taken shortly after sunset and you can clearly see the holiday lights. You can also see details in other parts of the image. Picture #4 was taken hours after sunset when it was completely dark outside. The lights are visible, but there is not much detail in the picture except for the area on the house that is lit by the Christmas lights.
Best Time to Take Pictures of Holiday Lights: The time of day/night that you take your Christmas/Holiday lights pictures will have a definite impact on the look of your pictures. Most people start taking pictures of outdoor holiday lights when it is pretty dark outside.
However, that is not necessarily the best time to get great shots of holiday lights. A good time to start taking pictures of holiday lights is during twilight. That is the time period when the sun has set, but before total darkness sets in. During that time period it is dark enough for the lights to stand out, but there will still be just a touch of lingering daylight in the atmosphere. That bit of light will make it possible to show more details of the overall scene in addition to the holiday lights.
Take a look at picture #3 below. It was taken shortly after sunset and you can clearly see the holiday lights. You can also see details in other parts of the image. Picture #4 was taken hours after sunset when it was completely dark outside. The lights are visible, but there is not much detail in the picture except for the area on the house that is lit by the Christmas lights.
Holiday Lights Picture #3, 2/5 Sec F3.4, ISO 200
|
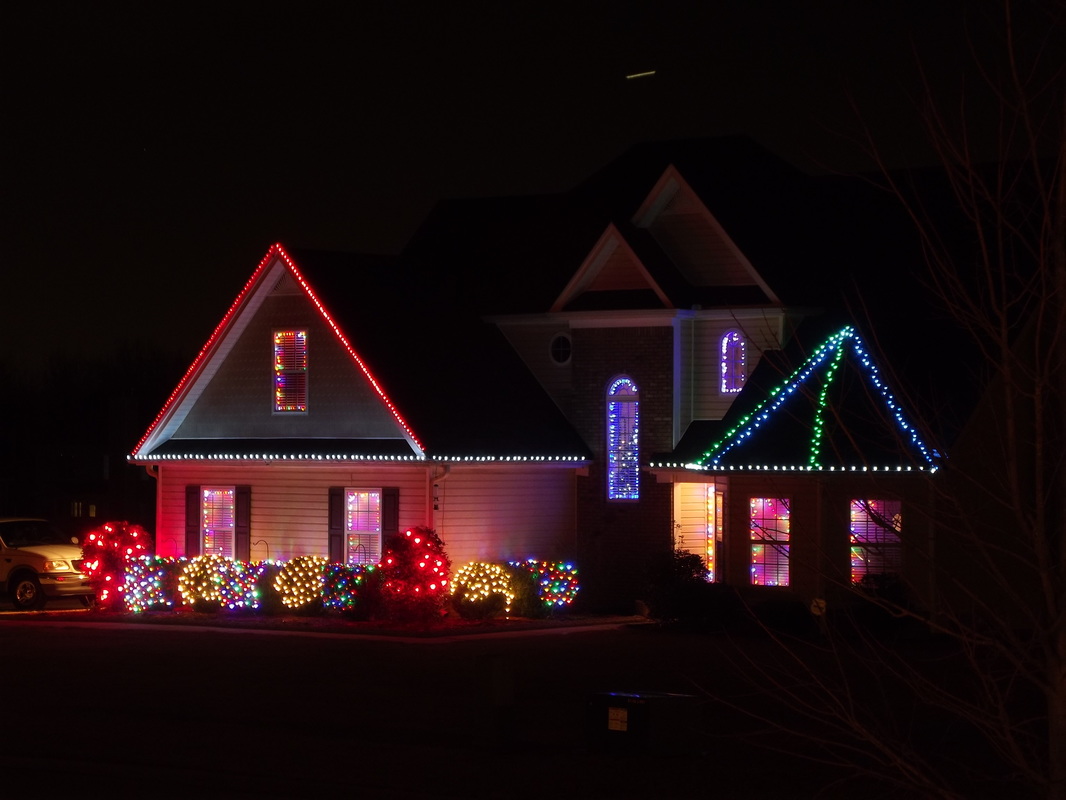
Holiday Lights Picture #4, Not enough detail showing in outer areas of image. 3 Sec, F4.8, ISO 100
|
Picture #4 is not a total loss because you can see some details of the house. However, it would be a much better picture if you could see some of the details of the surrounding area.
The after sunset and before total darkness time period for taking pictures of Christmas lights only lasts about 15-30 minutes. So it is a good idea to be ready to start taking pictures once the sun goes down and continue until it is almost totally dark.
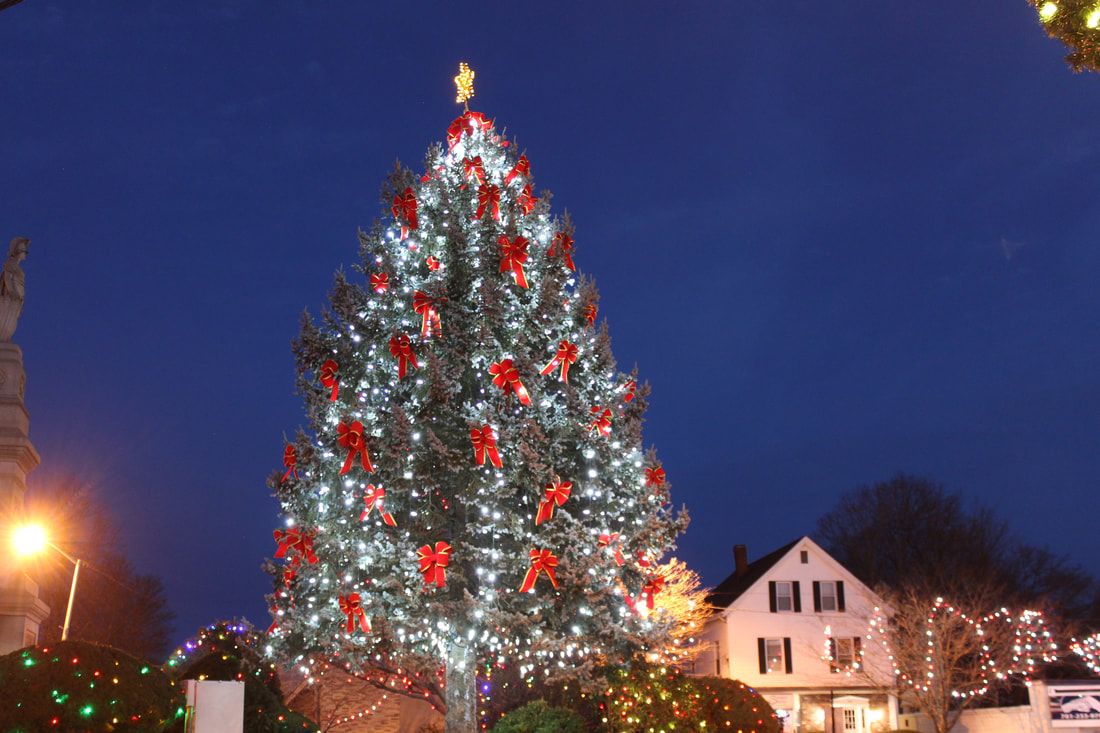
Within that time frame, the natural light and the Christmas lights will produce a good mix and you should come away with some pretty good images. Picture #5 below is a good example of the mixture of natural twilight and the artificial light from the Christmas tree.
The after sunset and before total darkness time period for taking pictures of Christmas lights only lasts about 15-30 minutes. So it is a good idea to be ready to start taking pictures once the sun goes down and continue until it is almost totally dark.
Within that time frame, the natural light and the Christmas lights will produce a good mix and you should come away with some pretty good images. Picture #5 below is a good example of the mixture of natural twilight and the artificial light from the Christmas tree.
Realistically, you won't always be in the right place, with your camera ready, to take pictures of Christmas lights during the time period mentioned above. So, go ahead and experiment with taking pictures of the holiday lights whenever you can. (Except in during bright daylight. The holiday lights will be overwhelmed by the natural light and will be barely visible if visible at all)
Once the natural light has changed to darkness, try shooting areas or scenes that have some sort of ambient light in addition to the Christmas or Holiday lights. The definition of ambient light can loosely be described as any light in a scene that is not supplied by the photographer. The ambient light source in a scene may be natural outdoor light, street lights, or any light that can possibly illuminate the scene.
This extra light will allow may allow more detail to be shown in the scene or parts of the scene. Picture #1 at the top of the page is an example. The buildings are pretty well lit and show lots of detail even though the sky is pretty dark. You can also see details of the buildings behind the tree in picture #5)
Now, with that being said, do not shy away from taking pictures of holiday lights once it is totally dark outside. There may be times that a totally dark (sometimes black) background might work well for you.
Holiday Lights Picture #5, 1/10 Second, F4.5, ISO 800
|
Holiday Lights Picture #6, 2/5 Second, F5.6, ISO 100
|
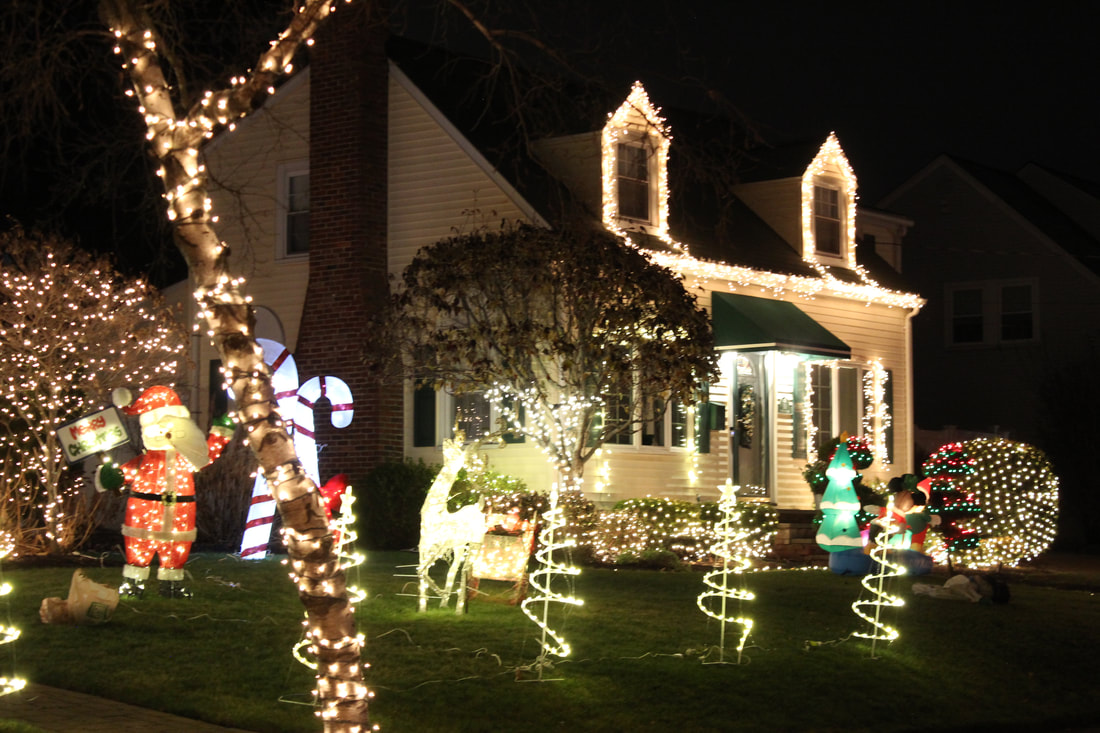
The holiday lights in picture #2 at the top of this page are evenly distributed. The house itself is pretty well lit because of the various lights attached to it. Also, the lights on the top edge of the roof create separation between the dark roof and the very dark sky. So in that image the dark sky background is not a problem since the primary subjects (the lights, the figures on the lawn, and the house) are clearly visible.
Next, take a look at picture #6. It is a picture of an ornament on a large tree outdoors. The dark background (black) is the sky. It actually makes the ornament stand out in the picture. However, there is no detail in the Christmas tree and the lights seem suspended in air. This effect is caused by the camera's light meter setting exposure values for the bright light which in turn causes the background to be underexposed.
This type picture could work artistically for some photographers, but maybe not for others. If you fall into the category of those who wouldn't want a black background for this shot, you could increase the exposure time and/or use a wider aperture. Or you could just try on another day when the sky is lighter.
So just be aware of the different looks the outdoor light can create in your pictures beginning just after sunset or when it is totally dark to determine what will work best for you.
Composing Pictures of Holiday Lights: The principles of composing any pictures applies to composing pictures of holiday lights as well. Try to get close to the subject area or use your camera zoom to make sure that the lights in the scene take up a good portion of the frame. Pictures of lights that are far away may not show clearly in the image.
In Holiday picture #7 below the lights are pretty well balanced in the frame. Yet the tree trunk, even with the lights on it is a little distracting sitting right in the foreground of the scene. The tree could have been left out of the image by simply moving a few feet to the right. However, since it is lit and looks similar to the rest of the scene, it doesn't ruin the picture.
 Holiday Picture #7, 3/10 Second, F5.6, ISO 1600
Photography consists of a lot of personal preferences so the picture could work with or without the tree in the foreground, depending on the preference of the photographer.
The point here is that when you are taking pictures, carefully check your camera's LED screen or viewfinder to make sure you are only including what you want in your pictures.
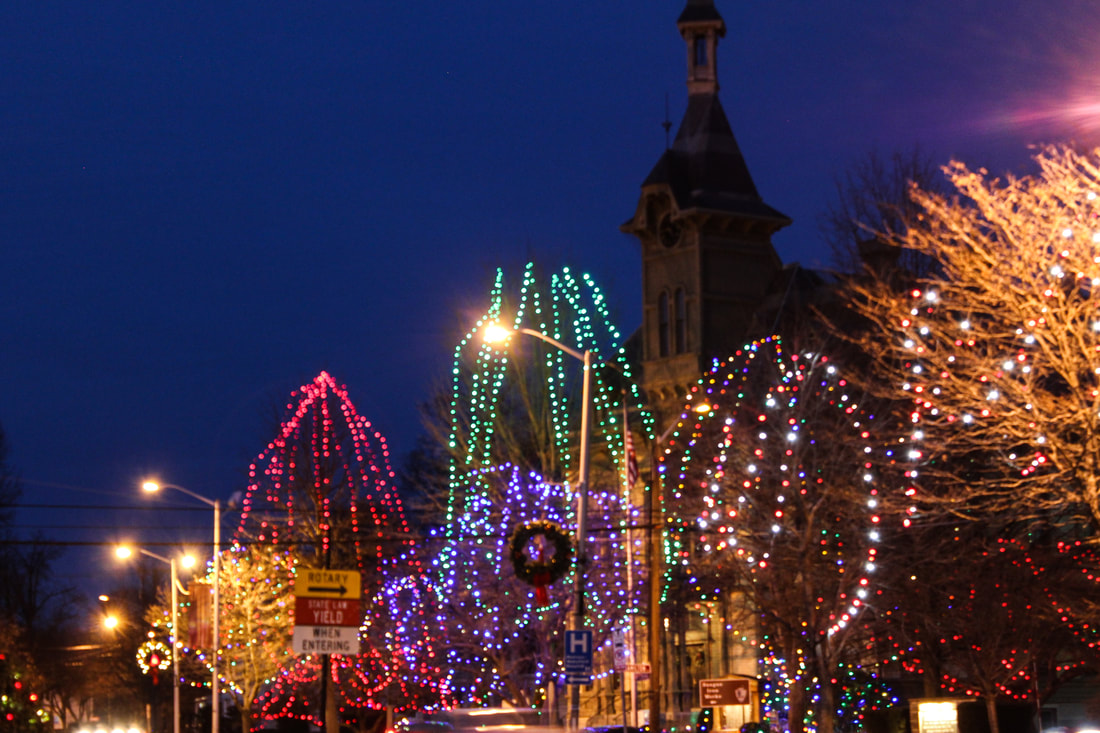
Try including the sky in some of your pictures of Christmas lights. The sky can provide a great background in contrast to the lights as you can see in pictures #8 & #9 shown below.
However, try to avoid including very large areas of black sky in your pictures. The focus should stay on the holiday lights and any surrounding subjects but not on a sky that is very underexposed. That is, unless the black sky works for whatever you are trying to accomplish artistically. For more tips on composing pictures, read Basic Photo Composition.
The point here is that when you are taking pictures, carefully check your camera's LED screen or viewfinder to make sure you are only including what you want in your pictures.
Try including the sky in some of your pictures of Christmas lights. The sky can provide a great background in contrast to the lights as you can see in pictures #8 & #9 shown below.
However, try to avoid including very large areas of black sky in your pictures. The focus should stay on the holiday lights and any surrounding subjects but not on a sky that is very underexposed. That is, unless the black sky works for whatever you are trying to accomplish artistically. For more tips on composing pictures, read Basic Photo Composition.
Go Downtown or in Town: Outdoor public areas are a good place get great shots of Christmas lights However, note that the sky area shown in these pictures is not totally black. That is because both pictures were taken before it was totally dark outside.
Holiday Picture #8, 2/5 Second, F3.5, ISO 800
|
Holiday Picture #9, 1/2 sec, F5.6, ISO 800
|
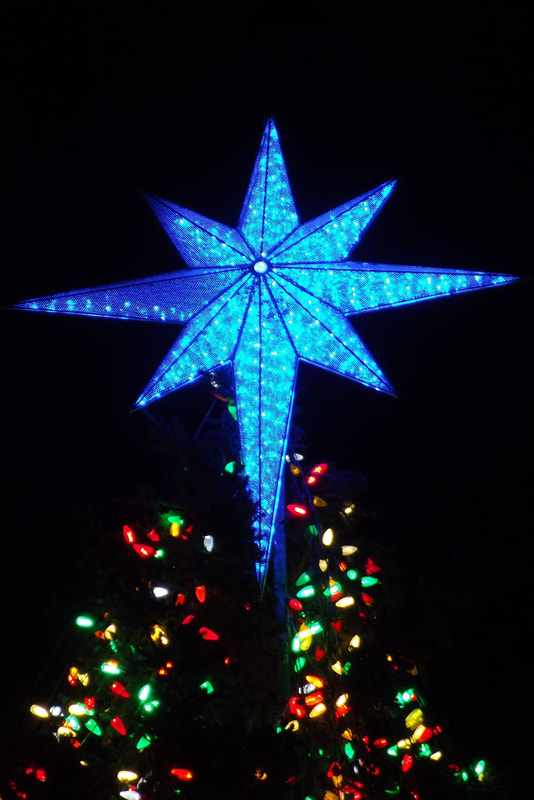
Get a little closer: Taking shots of overall holiday light scenes is fine, but also try taking closer shots that will still convey the holiday season. For instance, Picture #10 is a close up shot of a portion of a Christmas tree. Picture #11 is a back lit zoomed in shot of a Christmas wreath. They are both examples of things you might want to photograph that everyone else might not be paying attention to.
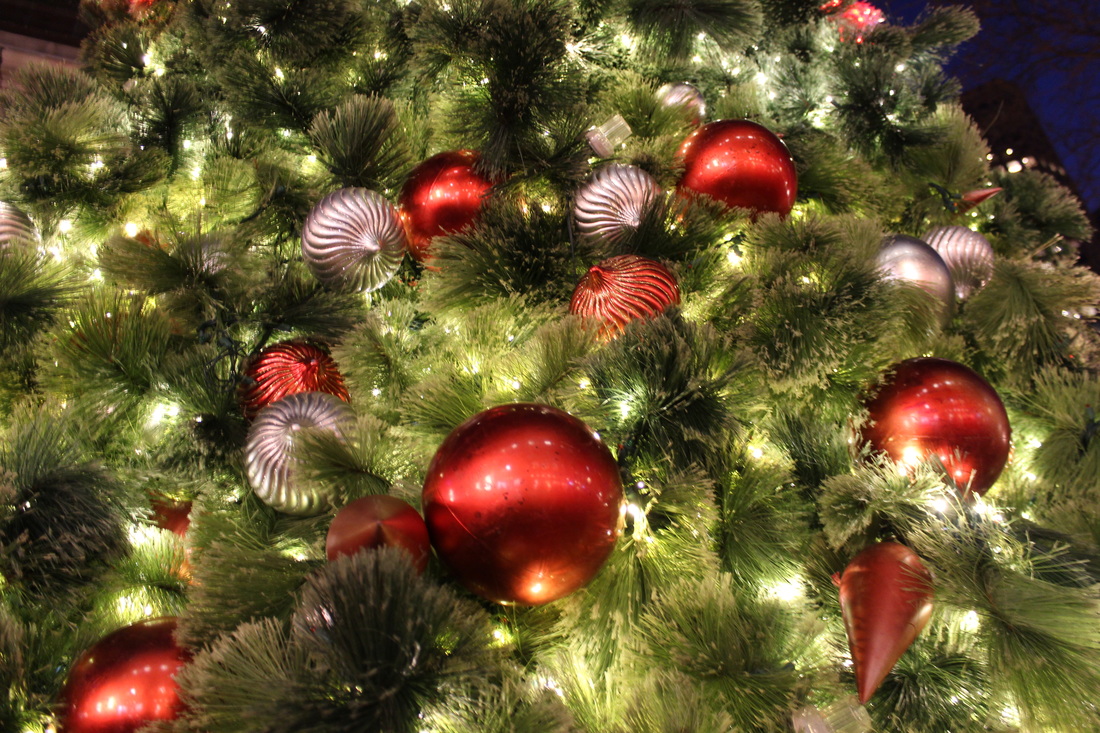
Holiday Picture #10, 1/5 Sec, F3.5, ISO 800
|
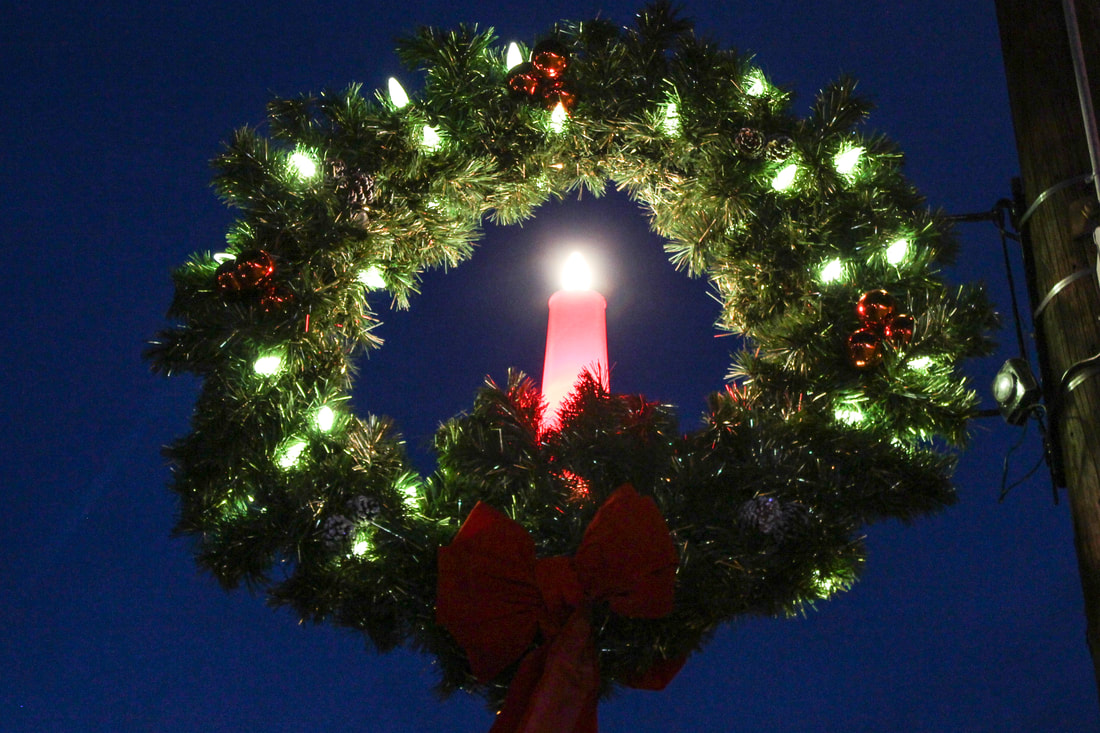
Holiday Picture #11, 1/20 Sec. , F5, ISO 800
|
Should you Use a Tripod? Since most Christmas/Holiday light pictures are taken during the time period from twilight heading into night, slower shutter speeds will be required for a good exposure. Along with slower shutter speeds comes the possibility of blurred pictures due to camera shake. It is difficult for most people to get sharp pictures when hand holding a camera and using a shutter speed less than 1/30th of a second. If you own a tripod, a good time to use it would be when you are taking pictures of holiday lights and using slow shutter speeds.
However, it is not impossible to get decent hand held shots of holiday light scenes. It depends on the amount of light in the scene, the shutter speed, and how steady you can hold a camera. As a matter of fact some of the images on this page were taken without using a tripod. Nonetheless, a tripod is like an insurance policy against going home with nothing but blurred pictures. Its a safer bet to use a tripod. There are plenty of reasonably priced tripods and mini tripods available through Amazon.
Do Not Use a Flash: Turn your flash off when taking pictures of outdoor holiday lights as it usually will not be effective. An exception would be if you are taking a picture of someone and you want the holiday lights to be part of the background scene.
In that case try using your camera's night portrait mode. Using the night portrait mode will cause the camera shutter to remain open a little longer than usual so that more light can be gathered from the overall night scene. The flash will fire during the exposure to illuminate the subject(s) in the foreground of the picture.
Camera Exposure Settings: The exposure settings from one holiday lights scene to the next will vary. Due to differences in the brightness and intensity of the lights being photographed as well as the ambient light in the overall scene, there are no "one size fits all" exposure settings. The exposure values listed under each of the images on this page show how wide ranging the settings can be for different scenes.
Using your camera in the automatic or a semi automatic mode will quite often produce good images.(with the right amount of available light) Today's camera metering systems can detect that the scene you are shooting is some sort of night scene and will try to choose the best exposure settings.
Start out by taking a test shot. If it looks ok, continue taking pictures. If not, try using your camera's Exposure Compensation EV-+ feature to make slight adjustments to the exposure. Be careful not to make too much of of an adjustment with the EV-+ feature. If you try to lighten dark areas too much, the lights will become overexposed, (blown out) If you try to darken the picture too much you will probably lose too much detail in parts of the image.
If you are going hand hold the camera to take pictures of holiday lights, start out using ISO settings around ISO 400 to ISO 800. (or higher if necessary) Those settings will allow slightly faster shutter speeds to be used. If you are using a tripod or have the camera placed on a steady surface, low ISO settings like ISO 100 to ISO 200 will work fine since you won't have to worry about camera shake caused by using a slow shutter speed.
Generally, using a somewhat wide aperture setting like F4.5 or F5.6, should help you get well exposed pictures. Since most of the pictures you take of outdoor holiday lights will not be close ups, deep depth of field settings like F11 or F16 won't usually be required. Also, using a wide aperture will allow faster shutter speeds to be used. Remember, a faster shutter speed comes in handy if you are taking pictures without a tripod.
If you are not familiar with how the camera shutter, aperture, and ISO settings work together to produce properly exposed pictures, read Camera Exposure Basics for more information on the subject.
White Balance: When you are photographing Christmas lights, there may be an unwanted tint in the image. For instance, tungsten bulbs will give a yellowish or orange tint to the scene. Using the Auto White Balance (AWB) setting in your camera will eliminate much of the off colored tint. If the Auto White Balance doesn't eliminate the off colored tint, check your camera manual for a white balance setting that will correct the tint of the particular light source. (many people may actually like the warm yellowish tint given off by tungsten/incandescent lights. In those cases, no need to adjust the AWB)
In closing, take lots of extra shots when photographing Christmas lights. If you start taking pictures from after sundown until it is totally dark, you will probably have some good images to choose from.
So, make taking pictures of holiday lights part of your enjoyment of the season and give it your best shot!