Camera Exposure Basics: Shutter Speeds, Aperture, F Stops, and ISO
In photography, the term exposure is a reference to how much light, and how long that light is exposed to the cameras' image sensor when the camera shutter release is pressed. In simple terms, the camera's exposure value settings determine if an image will be too light, too dark, or correctly exposed according to normal standards.
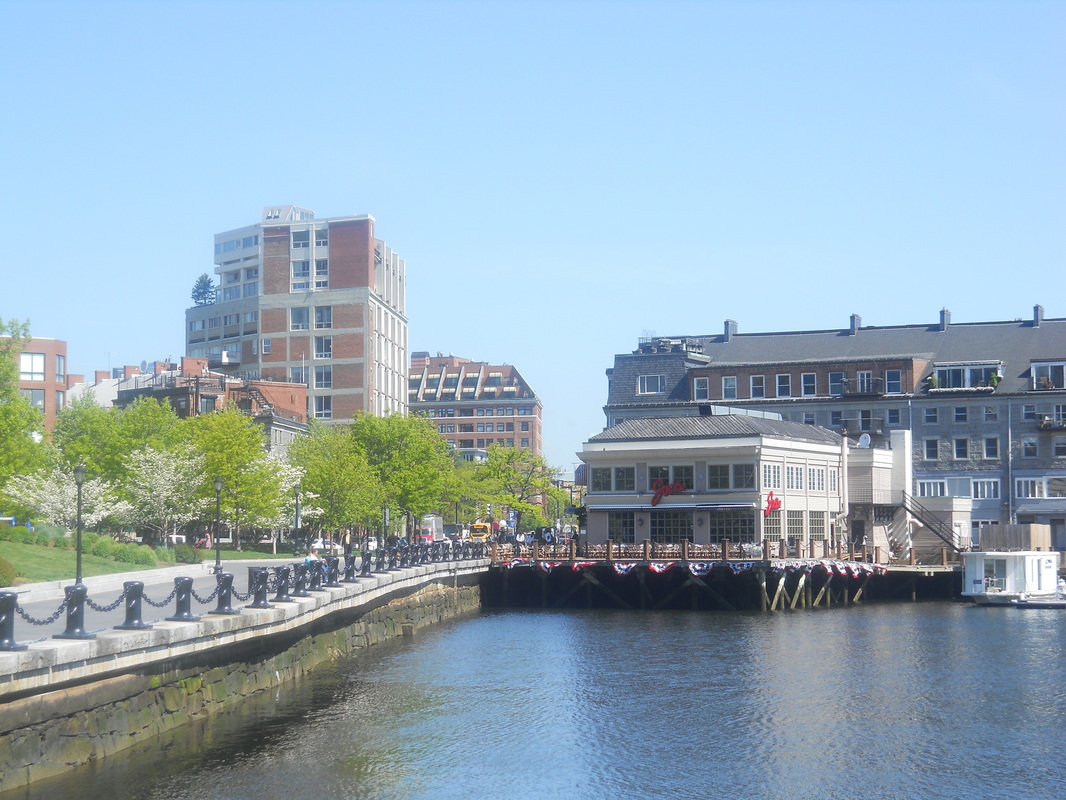
Overexposed Image
|
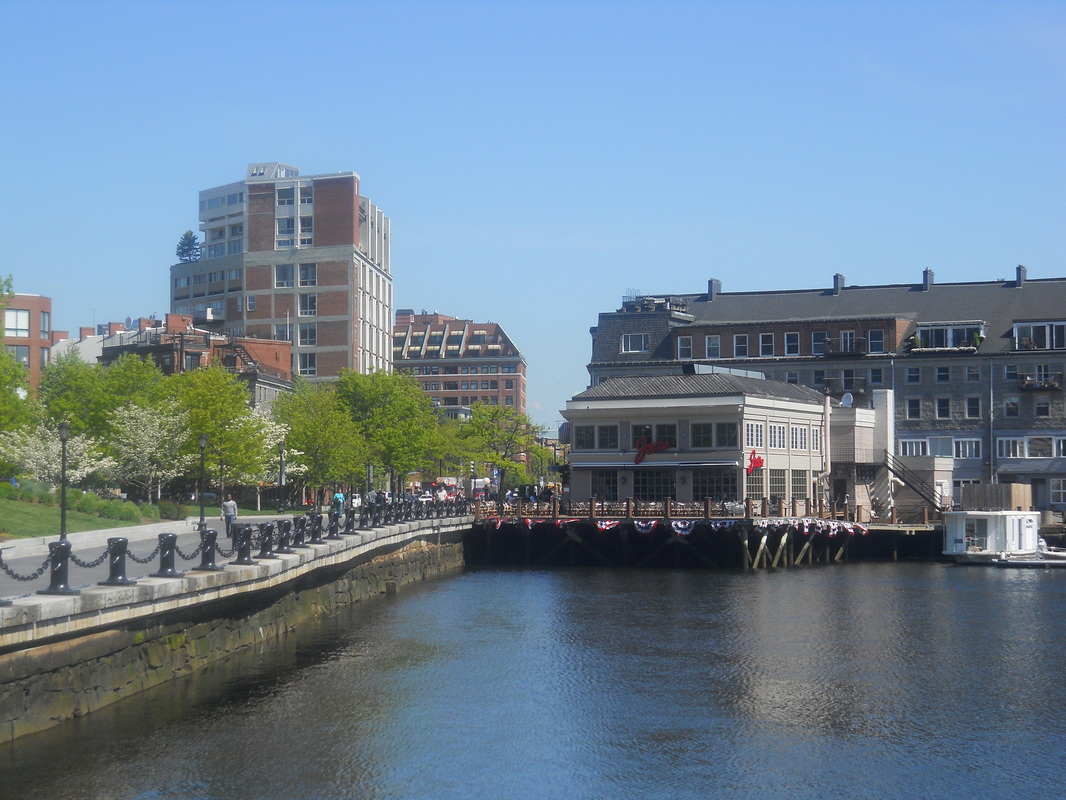
Better or "Correct" Exposure
|
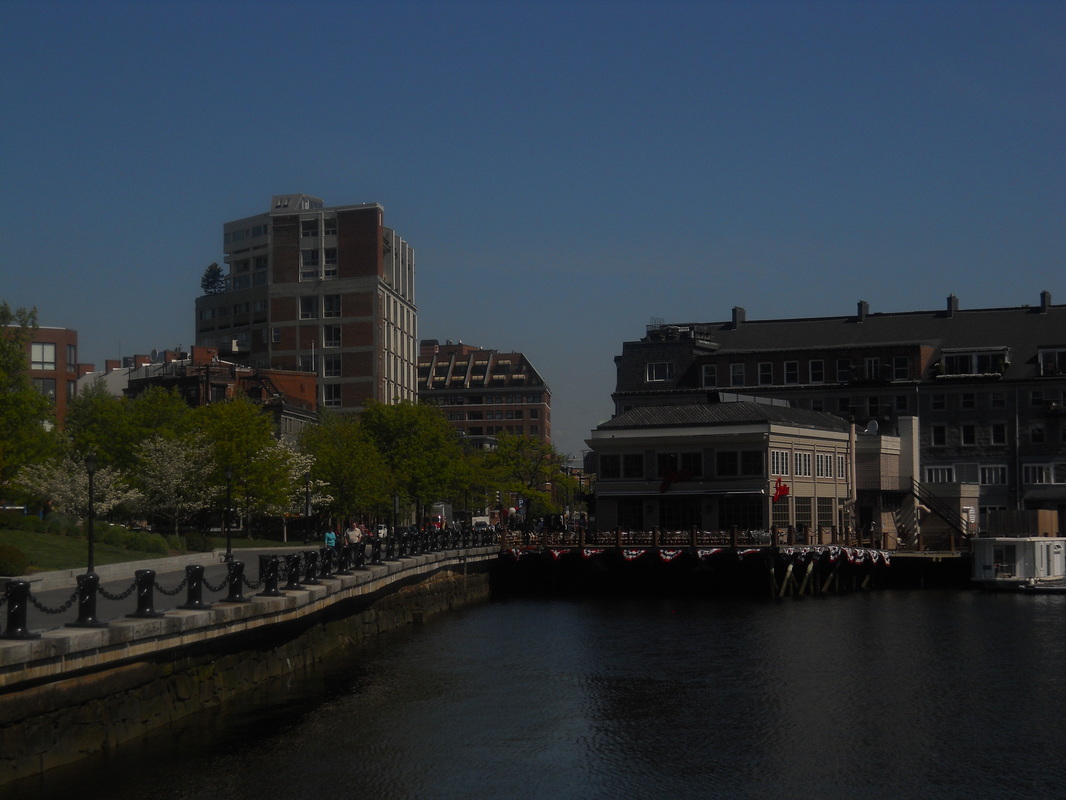
Underexposed Image
|
The correct or desired exposure is obtained by using a combination of the camera's Lens Aperture setting, the Shutter Speed, and the ISO setting. Those three functions are commonly known as the "Exposure Triangle".
All digital cameras have automatic shooting modes which enable you to just pick up your camera and start taking pictures without having to worry about the settings for a correct exposure. However, if there are times when you are not satisfied with the way your image(s) look when using the automatic mode, you may want to try using one of your camera's semi automatic or manual modes to get the look you want.
That would require you to have at least a basic knowledge of the function of the camera lens aperture, the camera shutter and the ISO settings. Digital SLR cameras like the Nikon D3500, or Mirrorless Compact System cameras like the Sony Alpha a6100 allow you to manually adjust all of the camera's exposure settings. Even some of todays smart phone cameras will allow you to control some of the settings but sometimes not all of them.
Take a look at each of the exposure functions individually, and then how they work in relation to each other.
The Lens Aperture: The camera lens aperture is located inside the camera lens. It is also known as the diaphragm. The size of the lens aperture opening determines the amount of light that reaches the camera's image sensor. (the image sensor inside the camera gathers the light coming through the camera lens to produce the picture or image you are taking)
The size of the aperture opening can be adjusted in Digital Slr and Mirrorless cameras to control the amount of light that reaches the image Sensor. (other cameras have fixed aperture sizes that cannot be adjusted, even some cell phone cameras with multiple lenses) The aperture chart diagram below shows the relative size of some of the aperture openings at different settings.
The size of the aperture opening can be adjusted in Digital Slr and Mirrorless cameras to control the amount of light that reaches the image Sensor. (other cameras have fixed aperture sizes that cannot be adjusted, even some cell phone cameras with multiple lenses) The aperture chart diagram below shows the relative size of some of the aperture openings at different settings.
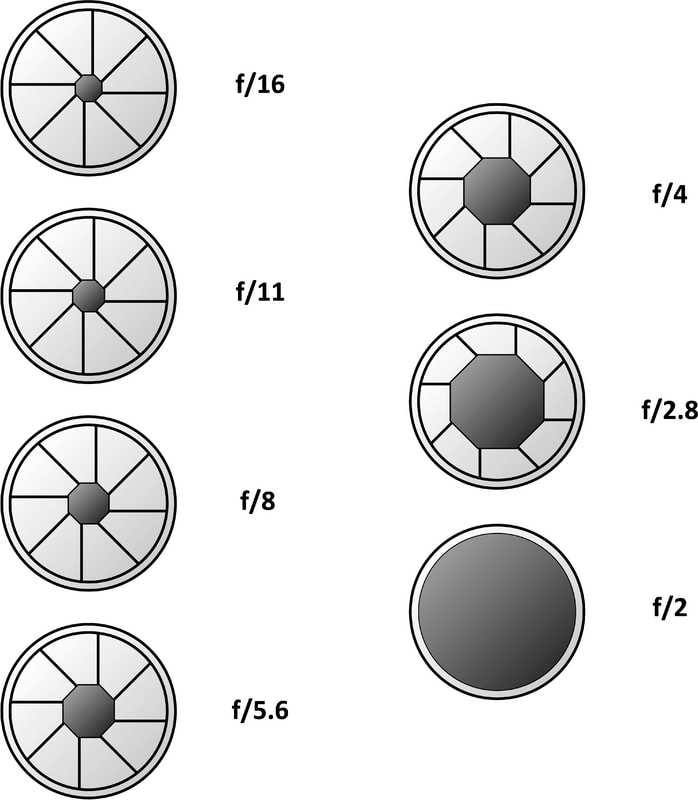 Camera Lens Aperture Opening Chart
The various lens aperture settings are called "F Stops". The aperture settings with the smaller F Stop numbers allow more light to reach the image sensor than the settings with the larger F Stop numbers.
As you can see from the diagram, the lens aperture opening for f2.8 is much larger than the size of the opening at f11 and will allow much more light to reach the image sensor.
Listed further below is an aperture chart. The F Stop numbers in red represent a full stop or step and the numbers in black are 1/3 increments between the full stops. A full stop in either direction will allow twice as much light, or half as much light to reach the image sensor.
For example, F4 allows about twice as much light to reach the cameras' image sensor than F5.6. On the other hand, F8 allows half as much light to reach the sensor than F5.6.

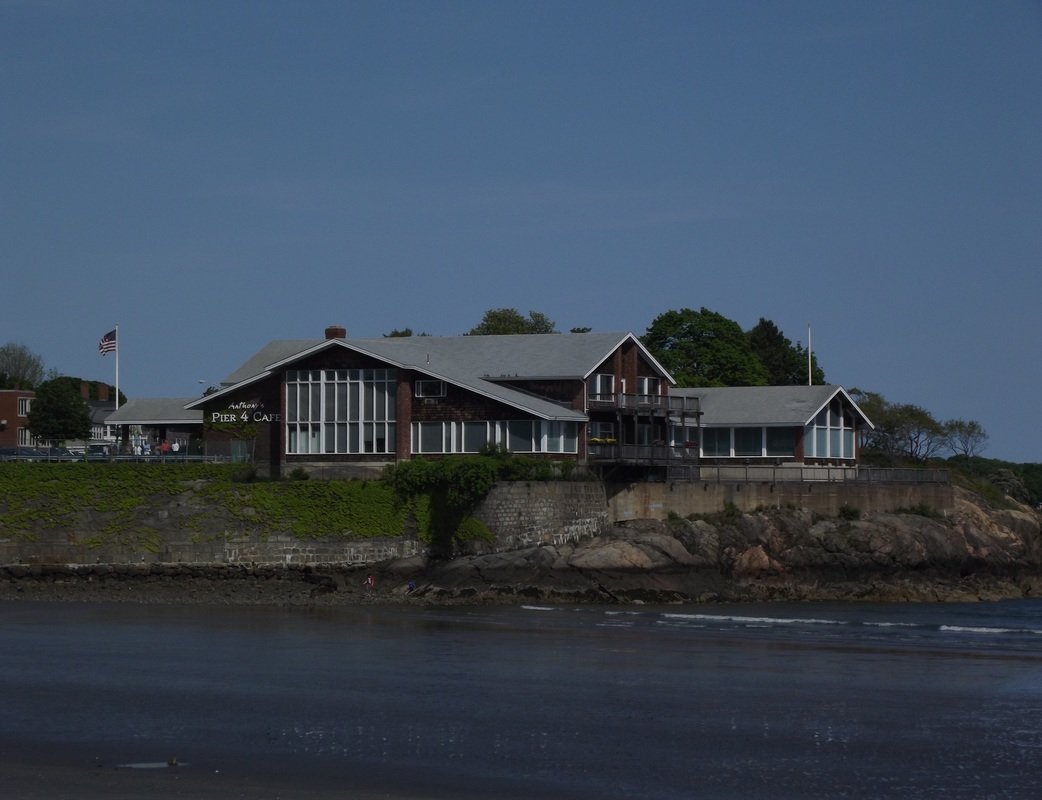
Picture #1, Aperture F10, Shutter Speed 1/400 sec, ISO 64
|
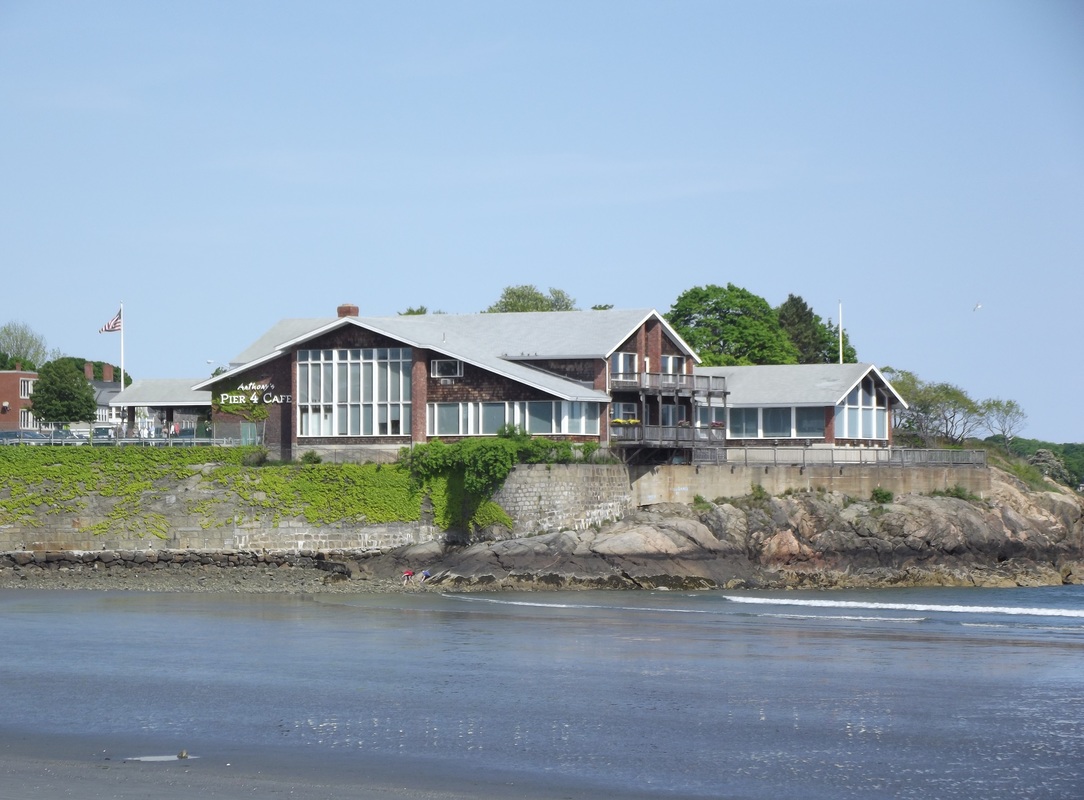
Picture #2, Aperture F5,
Shutter Speed 1/400, ISO 64
|
Take a look at picture # 1. It was taken with the lens aperture set to F10 and is much darker than picture # 2, which was taken with an F5 aperture setting. That is because the wider aperture opening of F5 allows more light to reach the image sensor than the smaller aperture opening of F10. In this example, the shutter speed and ISO settings are the same in both pictures.
You can see that even though the only setting that was changed was the lens aperture, the images look totally different. (as far as the brightness of the image)
Are your favorite family and vacation pictures just sitting in your computer or cell phone? Put them all on display with a Digital Photo Frame. A wide variety of sizes, and types of Digital Photo Frames are available at Amazon.com
Another important feature of the camera lens aperture is its effect on the Depth of Field in an image. Depth of field is a reference to how much of the image, (subject, foreground, and background) will be in focus. Using a wide aperture such as F2.8 or F3.5 helps to produce an image similar to picture # 3. Notice how the flower is in focus but the background area is out of focus. That effect is referred to as narrow, or shallow depth of field.
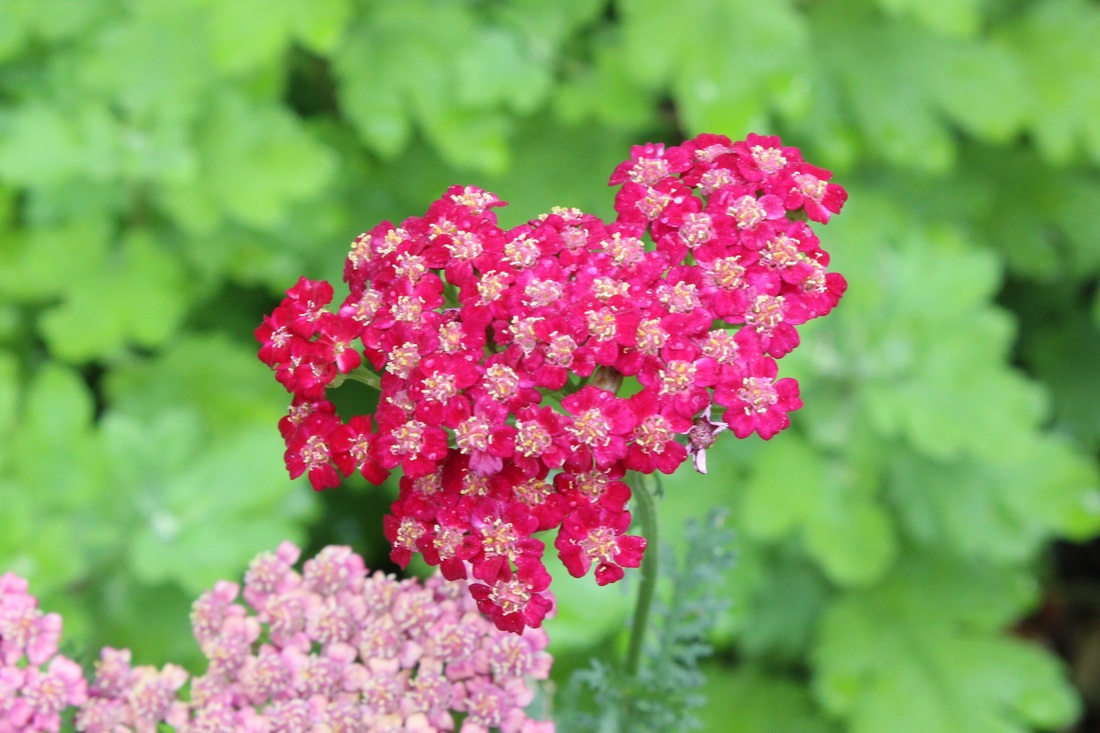
Picture #3, Shallow Depth of Field
|
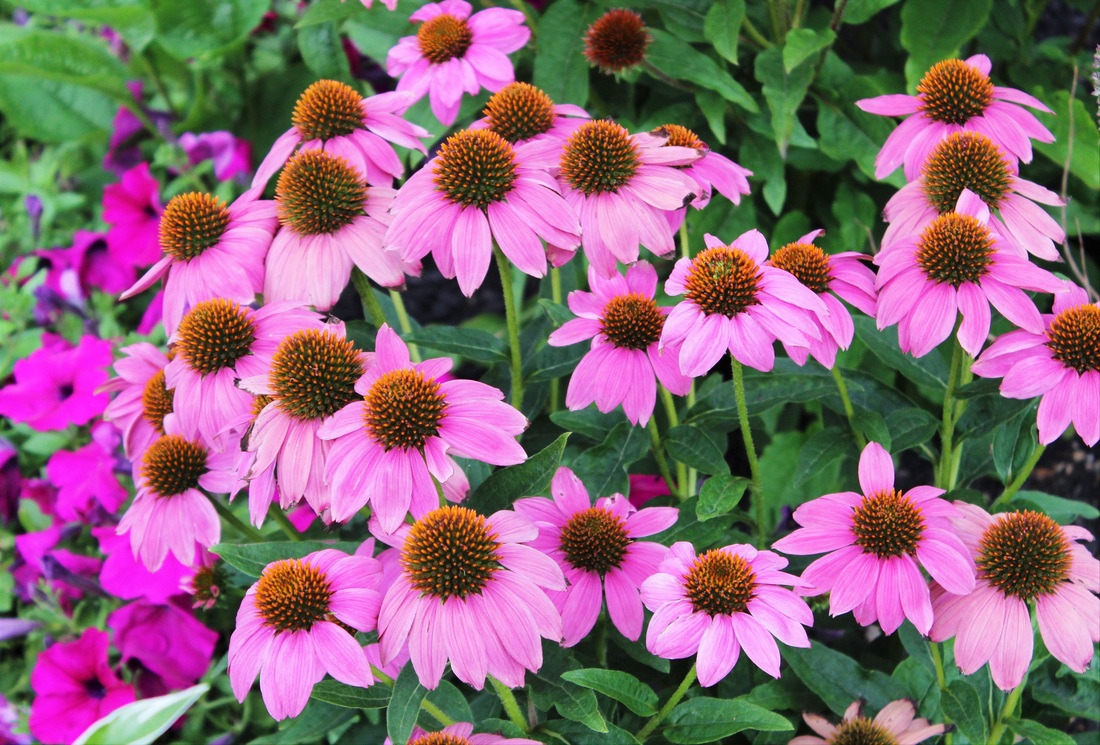
Picture #4, Deep Depth of Field
|
Using a smaller aperture opening like F11 or F16 might produce an image like picture #4 where just about everything is pretty much in focus. That effect is called wide or deep depth of field. However, take note that there are other factors such as the lens focal length,the lens to subject distance, and the type of camera lens being used that will also affect the depth of field in an image.
(in general it is easier to create shallow depth of field when using a lens with a longer focal length such as 85mm or longer. Lenses with shorter focal lengths such as 18mm to 50 mm will generally create images with wide or deep depth of field) For more about the function of the lens aperture, visit The Camera Lens Aperture
The Camera Shutter: The shutter speed determines the length of time that light will be exposed to the camera's image sensor. Shutter speeds are listed in seconds or fractions of a second. Those times reflect how long the camera shutter will be open during an exposure. Listed below is a chart showing shutter speeds in full steps and in 1/3 step increments.The numbers in red represent a full step or stop. A shutter speed of 1/60th of a second keeps the shutter open longer than a shutter speed of 1/125th of a second.
Important to remember: Changing the shutter speed by a full or partial step in either direction is the equivalent of changing the lens aperture setting by a full or partial F Stop in the same direction. (As far as how bright or dark your image will be.)

Lets refer back to picture # 1 in the lens aperture section. It is clearly too dark. The underexposure was corrected by changing the aperture setting from F10 to F5 which allowed more light to reach the image sensor. However, If you wanted to lighten that same picture without changing the aperture setting, you could simply change your shutter speed instead.
Changing the shutter speed from 1/400 sec to 1/100 sec will allow the light to be absorbed by the image sensor for a longer period of time. That change will yield the same basic result as changing the aperture from F10 to F5.
The point here is that changing the shutter speed by any given amount of "steps" or increments will have the same effect as changing the aperture by an equal number of steps. (as far as the lightness or darkness of the image and as long as the change is in the same direction)
The shutter speed also has an effect on the look of an image when there is motion in a scene. If there is fast movement in a scene, you might need to use a fast shutter speed to avoid motion blur. Take a look at the moving car in picture # 5.
The car in the picture is blurred because the shutter speed of 1/60 was not fast enough to "freeze" the subject. The car in picture # 6 was shot using the faster shutter speed of 1/250 which was fast enough to "freeze" the movement of the car.
The car in the picture is blurred because the shutter speed of 1/60 was not fast enough to "freeze" the subject. The car in picture # 6 was shot using the faster shutter speed of 1/250 which was fast enough to "freeze" the movement of the car.
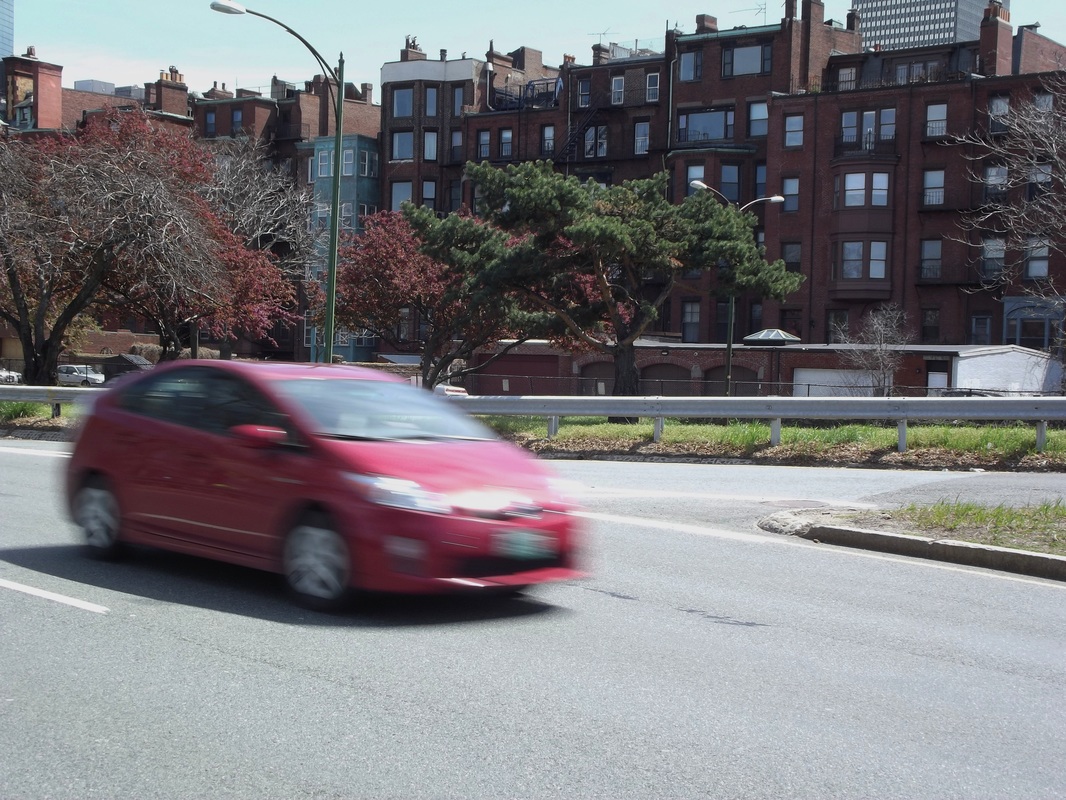
Picture #5, Shutter Speed 1/60
|
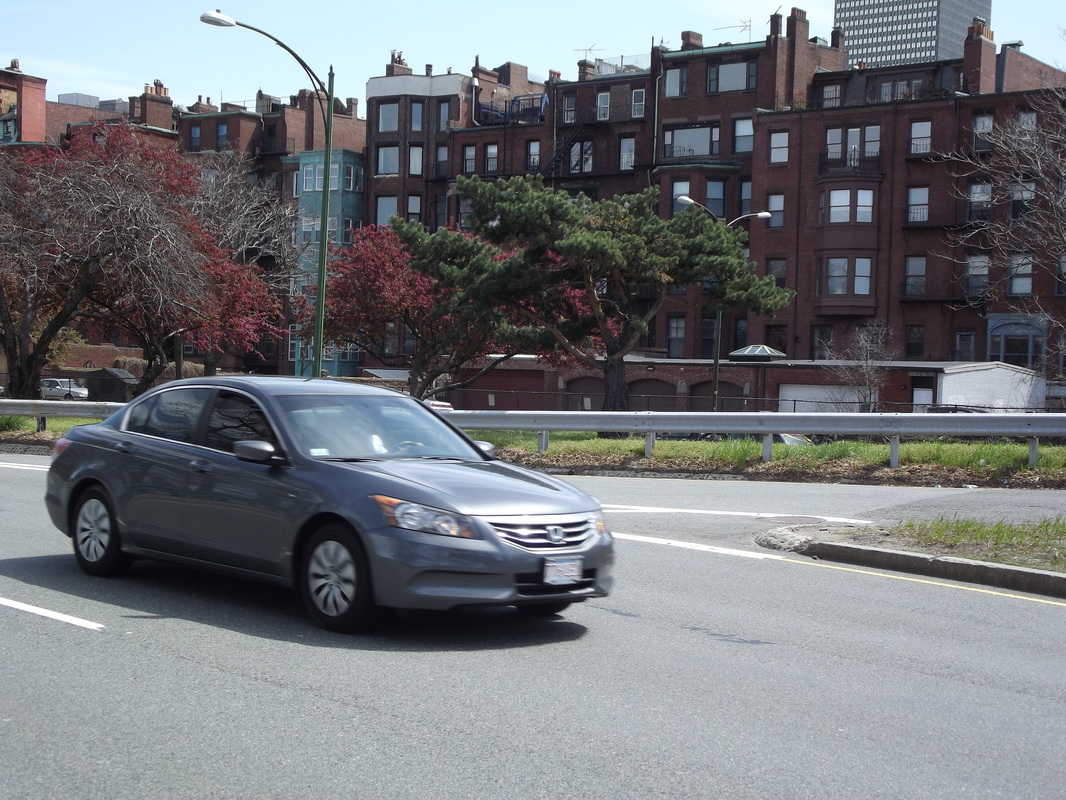
Picture #6, Shutter Speed 1/250
|
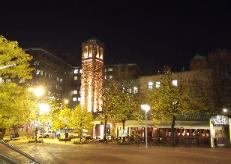 Picture #7, Shutter Speed 1 second,
Aperture F3.4,
ISO 400
Picture #7, Shutter Speed 1 second,
Aperture F3.4,
ISO 400
On the other hand, there may be times when using a slower shutter speed might be your best or only option. For instance, if you try to take pictures at night using a shutter speed like 1/250, they will almost certainly come out black or severely underexposed. Sometimes that will happen even if you use your widest lens aperture opening.
(Also, for this example, assume that the camera ISO is not at its highest setting. ISO settings are covered next)
Picture #7 was taken in a fairly well lit area by night photography standards.The shutter speed was 1 full second with a somewhat wide aperture setting of F 3.4. Can you imagine what the image would look like if it had been taken using a shutter speed of 1/250? (assuming the same lens aperture and ISO settings were used) Read The Camera Shutter and Shutter Speeds for more on this subject.
The ISO Function: The ISO setting determines the image sensors' sensitivity to the available light. Lower ISO number settings will require more light for the image sensor to produce a good image than when the camera is set to a higher ISO number. A camera set to ISO 400 will need less light to produce a correctly exposed image than when it is set to ISO 100.
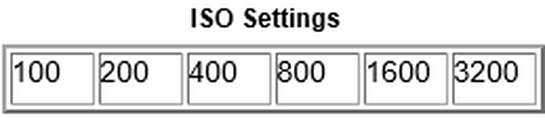
The following are a few of the most common ISO settings. (there may be more that show in your camera but we will just use these to keep things simple)
(Also, for this example, assume that the camera ISO is not at its highest setting. ISO settings are covered next)
Picture #7 was taken in a fairly well lit area by night photography standards.The shutter speed was 1 full second with a somewhat wide aperture setting of F 3.4. Can you imagine what the image would look like if it had been taken using a shutter speed of 1/250? (assuming the same lens aperture and ISO settings were used) Read The Camera Shutter and Shutter Speeds for more on this subject.
The ISO Function: The ISO setting determines the image sensors' sensitivity to the available light. Lower ISO number settings will require more light for the image sensor to produce a good image than when the camera is set to a higher ISO number. A camera set to ISO 400 will need less light to produce a correctly exposed image than when it is set to ISO 100.
The following are a few of the most common ISO settings. (there may be more that show in your camera but we will just use these to keep things simple)
It is usually best to use lower number ISO settings when taking pictures. That is because the overall quality of the image will be better. Very high ISO number settings tend to produce grainy images that have tiny specks called digital camera "noise" (Check the tutorial "What is ISO" for an example)
However, there may be times that using a higher ISO setting might be the best way to go. A simple example might be when you are in a poorly lit place and your pictures are coming out too dark. If your camera is set on ISO 100, change it to ISO 200, ISO 400 or whatever setting gives you a lighter picture.
(the example refers to situations where the shutter speed and aperture settings are not the primary concern) Remember, the higher number ISO settings require less light to produce a well exposed picture.
Here is another example of when you might need to change the ISO setting. Lets say you are at an indoor sporting event with lots of fast movement. Your camera is set to ISO 100. The cameras' exposure metering system suggests a lens aperture setting of F4 and a shutter speed of 1/30 for a correctly exposed picture. (assume that F4 is your maximum aperture width)
As previously shown, a shutter speed of 1/30 won't be fast enough to "freeze" fast moving action. However, a shutter speed of 1/250 could work well in many situations. Change your ISO setting from ISO 100 to ISO 800. Next, change your shutter speed from 1/30 to 1/250. You will then probably be able to take a properly exposed picture with the action "frozen" instead of blurred.
As you have probably noticed, changing the ISO setting by a certain number of steps is the same as changing the shutter speed the same amount of steps. That principle also applies to the ISO in relation to the aperture setting.
Aperture Priority, Shutter Priority, and Program modes: The majority of material in this tutorial refers to using your camera in the Manual mode where you can set the lens aperture, shutter speed, and ISO separately.
Just remember that you don't always have to set each function individually each time you take a picture. Try using one of your cameras' semi automatic modes. If the shutter speed is most important to you for a particular shot, try using the Shutter Speed Priority mode. When using the Shutter Speed Priority mode, you set the desired shutter speed, and the camera will automatically set the aperture that should produce a correctly exposed image.
On the other hand, if the lens aperture setting is most important to you, try using the Aperture Priority mode. You choose the lens aperture setting you want to use and the camera will set a shutter speed that should produce a correctly exposed picture.
Lastly, if you aren't concerned about shutter speeds or aperture settings but want to change your ISO setting, just use your camera's program mode. In the program mode the camera will automatically choose the shutter speed and aperture setting for the best exposure. In the Program Mode you will still be able to change the settings for things like the ISO and White Balance.