Flower Photography: How to Photograph Flowers

|
|
The vivid colors, shapes, and various appearances of flowers make them one of the most popular photography subjects. Getting a really nice picture of a flower can be very rewarding and is usually not too difficult. However, there may be times it might be a little challenging. The following are are some useful tips on how to photograph flowers.
Equipment for taking pictures of flowers: You don't need a special camera for flower photography. You can take some pretty good pictures of flowers with a simple Compact Camera like the Canon Powershot ELPH 190IS. You can even takes some nice shots of flowers with a cell phone.
A Digital Slr camera like the Nikon D3500 or a compact system camera like the Sony Alpha a6100 will give you more control over the camera settings and may produce higher quality images . However, keep in mind that it is the photographer, not the camera that takes great pictures.
It is not usually necessary to use a Tripod when taking pictures of flowers as long as there is enough available light to use a moderately fast shutter speed. (lets say 1/125 second or faster) . However, in some flower photography situations a tripod may help you get sharper pictures of the flowers.
That is because when you take very close up pictures, even the slightest camera shake can cause blur which will show in the picture. (especially when using a lens set at a long focal length) Using a tripod along with a remote shutter release or the camera's self timer will greatly reduce the chance of you taking blurred pictures due to camera shake.
Composing Pictures of Flowers/Move in closer: While there is no set rule to use for photographing any particular type of flower, the way that you compose your photos of flowers can enhance the overall look of your images.
For instance, if your primary subject is only a few flowers that are embedded in a wide area of leaves or different flowers, move in closer. Try to fill a good portion of your viewfinder or LCD screen with your subject.
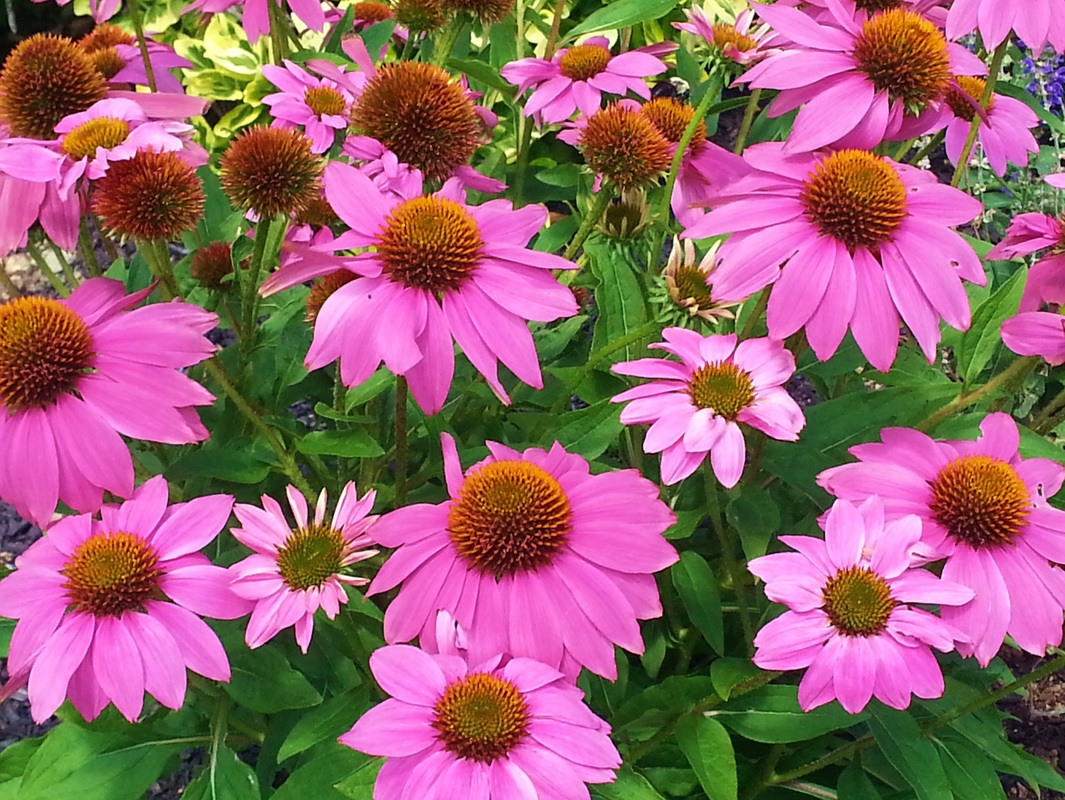
Flower Picture #1
Take a look at flower picture #1. There is no particular point of interest that stands out in the photo. The flowers are pretty scattered and this picture is not well balanced.
Moving in closer and targeting a smaller area of the scene will draw more attention to specific flower(s) |

Flower Picture #2
|
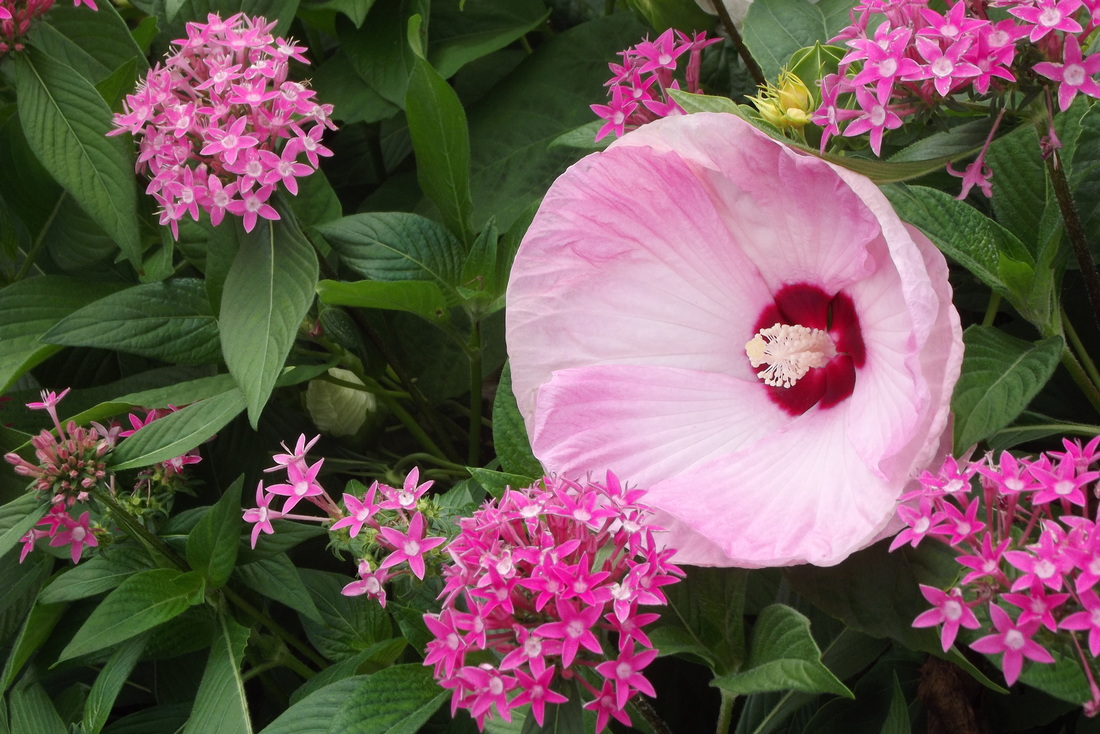
Flower picture #2 is a closer shot of the same flower that is in the middle of picture #1. Picture #2 shows more details of the flower and gives the viewer more of a focus point. It is also a more balanced and less busy picture
That was easily accomplished by moving closer to the flower and using the camera in a vertical position instead of the horizontal position. Don't forget that you can also use your lens zoom to get a closer shot.
That was easily accomplished by moving closer to the flower and using the camera in a vertical position instead of the horizontal position. Don't forget that you can also use your lens zoom to get a closer shot.
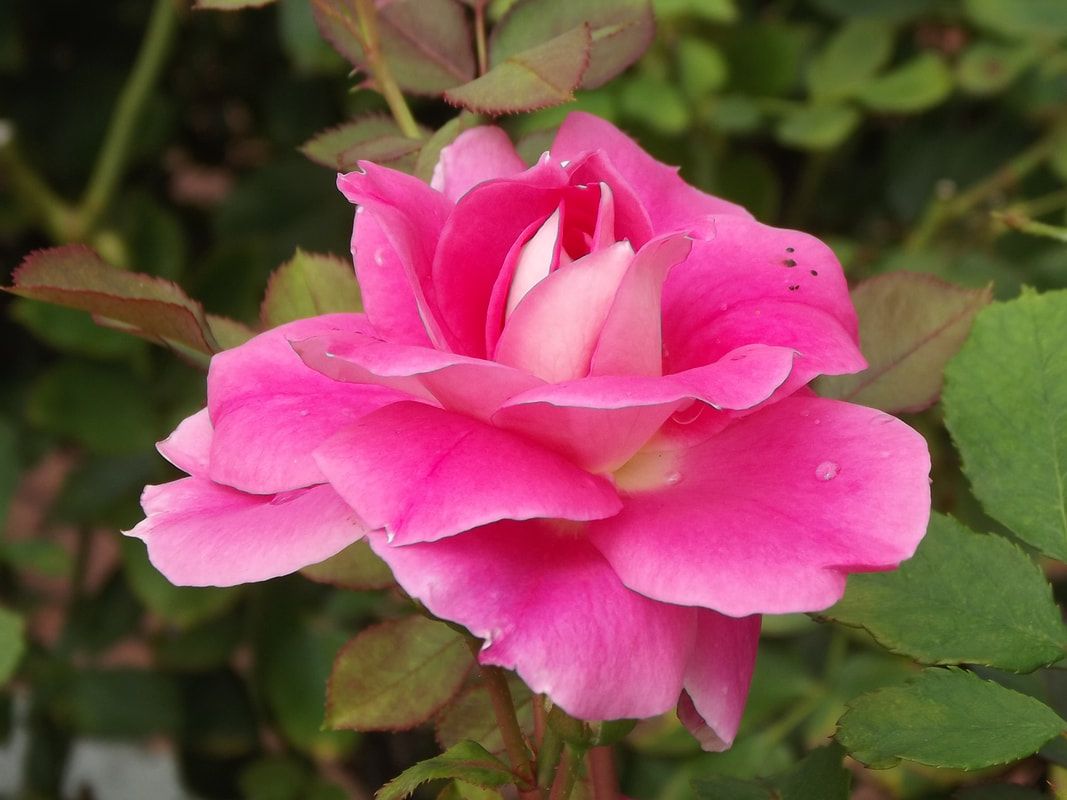
 Flower Picture #3
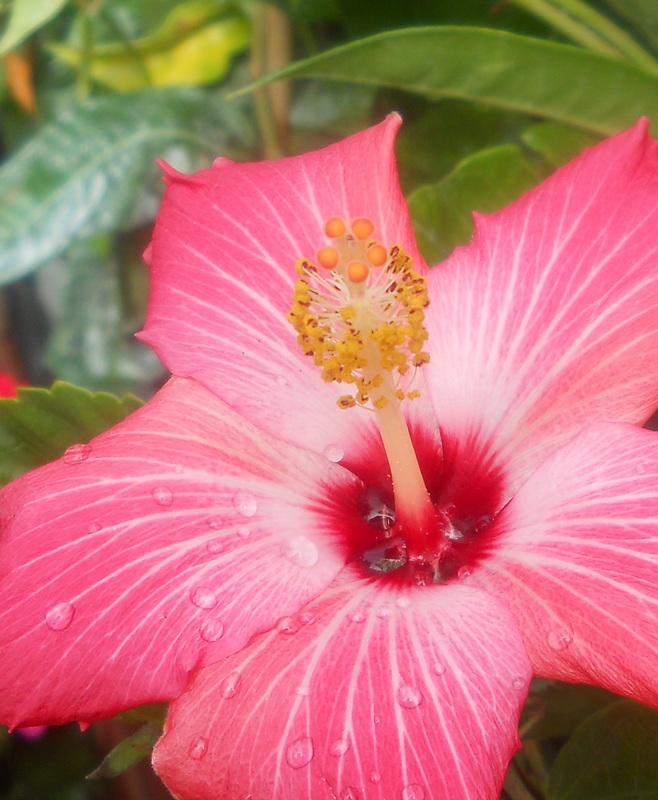
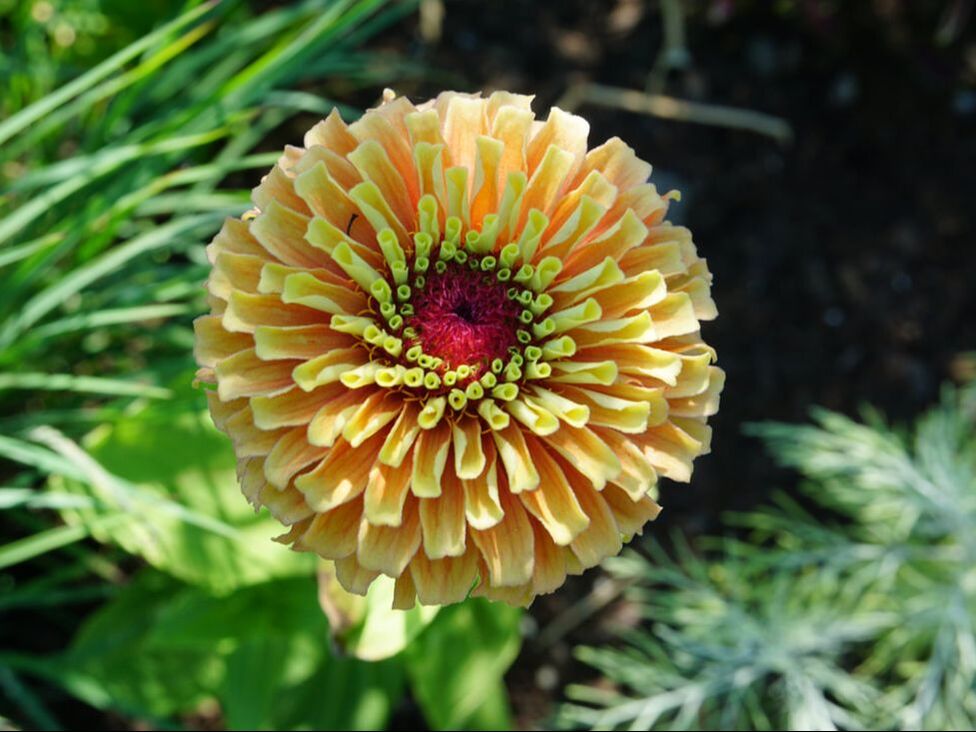
Another effective technique for photographing flowers is to move in even closer to the flower or use your camera's zoom to take a nice tightly cropped shot similar to picture #3..
Taking a very tightly cropped shot as in picture #3 will show more details of the flower that might not be noticeable in a picture that is taken from a further distance.
The fine details of the flower and the rain droplets on the small flower in picture #3 are more noticeable because it was framed as a very close tight shot.
Also, if possible, try changing your position or the angle of the camera when taking any of your flower pictures so that you have different views of the flower(s) to choose from.
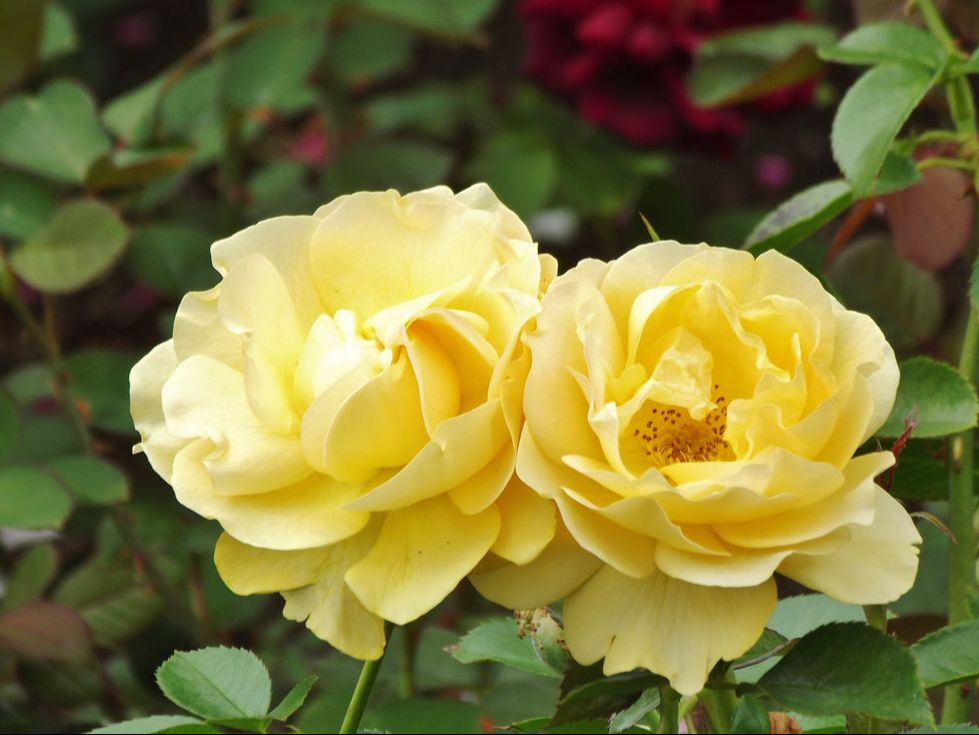
Groups of Flowers: Flower photography is not only about taking pictures of individual flowers. You may come across large groups of flowers or floral arrangements that are great flower photography subjects. Pictures #4 and #5 are nice pictures of groups of flowers.
When taking shots similar to those, you want to make sure that there is balance in the image. In other words, you usually won't want a few flowers on the left, then a gap, and more isolated flowers to the right or somewhere else in the image.
Taking a very tightly cropped shot as in picture #3 will show more details of the flower that might not be noticeable in a picture that is taken from a further distance.
The fine details of the flower and the rain droplets on the small flower in picture #3 are more noticeable because it was framed as a very close tight shot.
Also, if possible, try changing your position or the angle of the camera when taking any of your flower pictures so that you have different views of the flower(s) to choose from.
Groups of Flowers: Flower photography is not only about taking pictures of individual flowers. You may come across large groups of flowers or floral arrangements that are great flower photography subjects. Pictures #4 and #5 are nice pictures of groups of flowers.
When taking shots similar to those, you want to make sure that there is balance in the image. In other words, you usually won't want a few flowers on the left, then a gap, and more isolated flowers to the right or somewhere else in the image.
Flower Picture #4
|
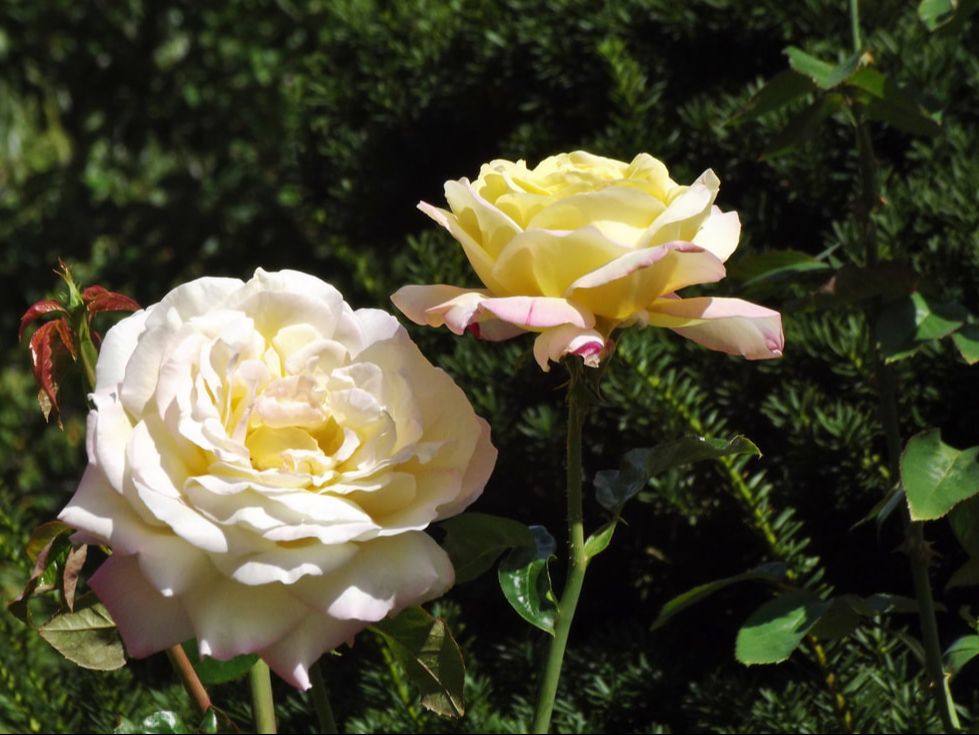
Flower Picture #5
|
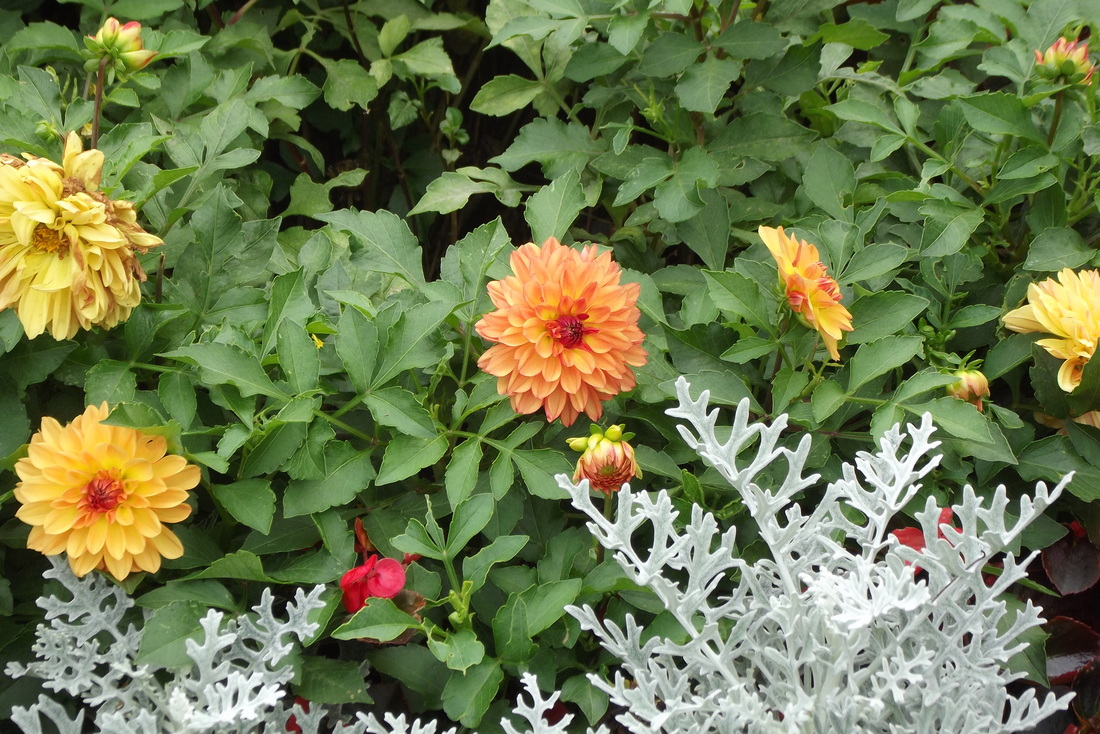
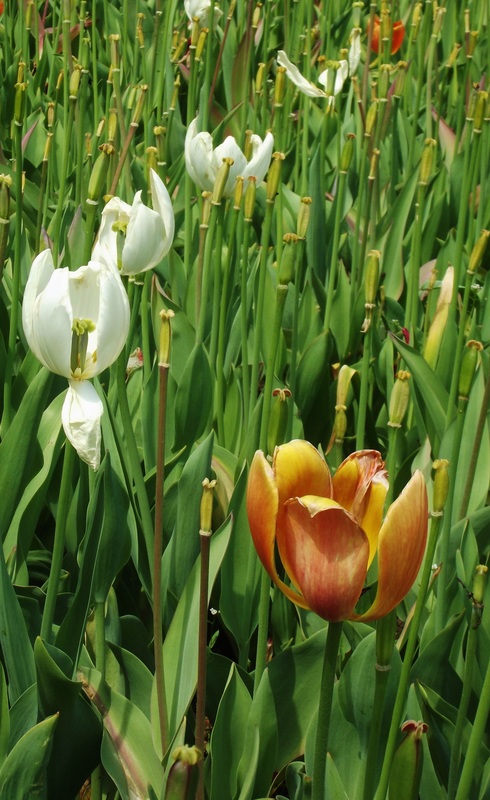
Flower picture #4 has a large plant in the middle. Yet it does not totally dominate the image because it is complemented by large leaves and the colorful small flowers around it. So there is balance in the picture.
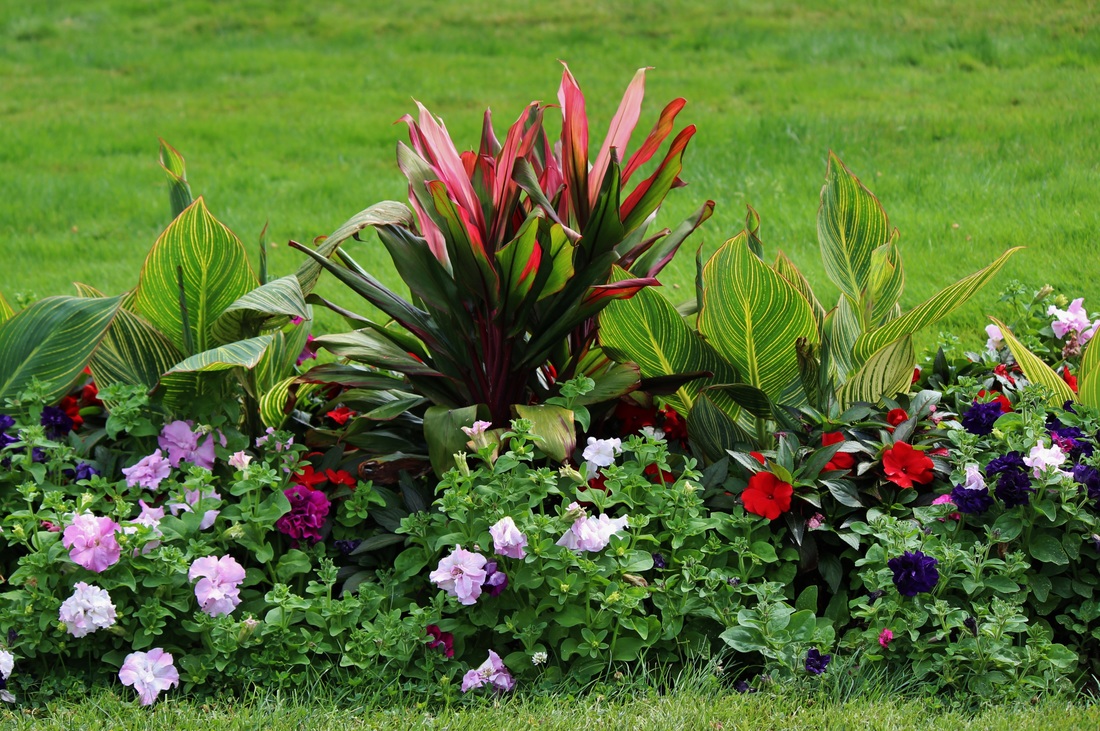
Picture #5 is a group of flowers that are all similar to each other. Compare this picture to image #1. It was previously stated that picture #1 had no particular focal point. Neither does picture #5. However, the big difference between picture #1 and picture #5 is that there is more consistency and balance in picture #5.
While there is not one flower in picture #5 that is the center of attention, the focus point is all of the colorful flowers which are spread pretty evenly.
.............Why not make prints or enlargements of your best flower images? Find out how quick and easy it is at Shutterfly.com...............
Quite often, using the rules of Basic Photo Composition can work well with flower photography. However, it is ok to be creative and break the rules at times as long as your picture contains something interesting that will draw and hold the viewers attention.
Flower Photography and Light: As long as it is light outside, you can take some very nice pictures of flowers. However, the quality of the light will affect the overall look of your pictures. The quality of light is a reference as to whether it is a clear day outdoors with bright sun, or a cloudy, overcast day.
Take a look at flower picture #6. It was taken on an overcast day. There are no sharp edged shadows anywhere in the entire picture. The overall look of the flowers is quite soft and they are pretty evenly lit.
Flower Picture #6
|
 Flower Picture #7 Flower Picture #7
|
It is also possible to take nice pictures of flowers in bright direct sunlight. Take a look a flower picture #7. It was taken on a sunny day. There are shadows on parts of the flowers but they do not detract too much from the overall look of the picture. Everything looks quite natural.
Flower pictures #8 and #9 are 2 more examples of how the light can affect the look of photos of flowers. Picture #8 was taken on an overcast/cloudy day. Again, notice how the lighting on the flower is very even with no harsh shadows. Flower picture #9 was taken on a sunny day. The flower has shaded areas along with brighter highlight areas. The background also has extremes of light and dark areas.
Flower pictures #8 and #9 are 2 more examples of how the light can affect the look of photos of flowers. Picture #8 was taken on an overcast/cloudy day. Again, notice how the lighting on the flower is very even with no harsh shadows. Flower picture #9 was taken on a sunny day. The flower has shaded areas along with brighter highlight areas. The background also has extremes of light and dark areas.
Flower Picture #8
|
Flower Picture #9
|
In any case, do not forego taking pictures of flowers just because it is a sunny day. Just be aware of deep shadows and how they may possibly affect the look of your flower pictures.
Quick Flower Photography Tip: When you get close to your flower subject(s) on a bright sunny day, your body or the camera might cast an unwanted shadow on part of the flower or the area around it. So check to make sure that you aren't casting any unintended shadows into the area being photographed.
On the other hand, if possible, you might want to intentionally cast a shadow on the entire flower and the area around it by blocking the sun with your body. That way you will avoid having very bright sunlit areas on one part of your subject and then deep shadows on the other part.
Of course, where you are standing and the the position of the sun in the sky will determine if it will be possible to intentionally cast a shadow on your subject.
Focusing when Photographing Flowers: One of the challenges you will face when taking pictures of flowers is precise focusing. If you are taking pictures of flowers from a distance of a couple of feet or more, you shouldn't have much of a problem with general auto focusing.
Flower Picture #10
|
Flower Picture #11
|
However, as you get closer to the flower, (lets say about a foot away) the camera lens might not be focusing on the exact area that you intended to be the focus point.
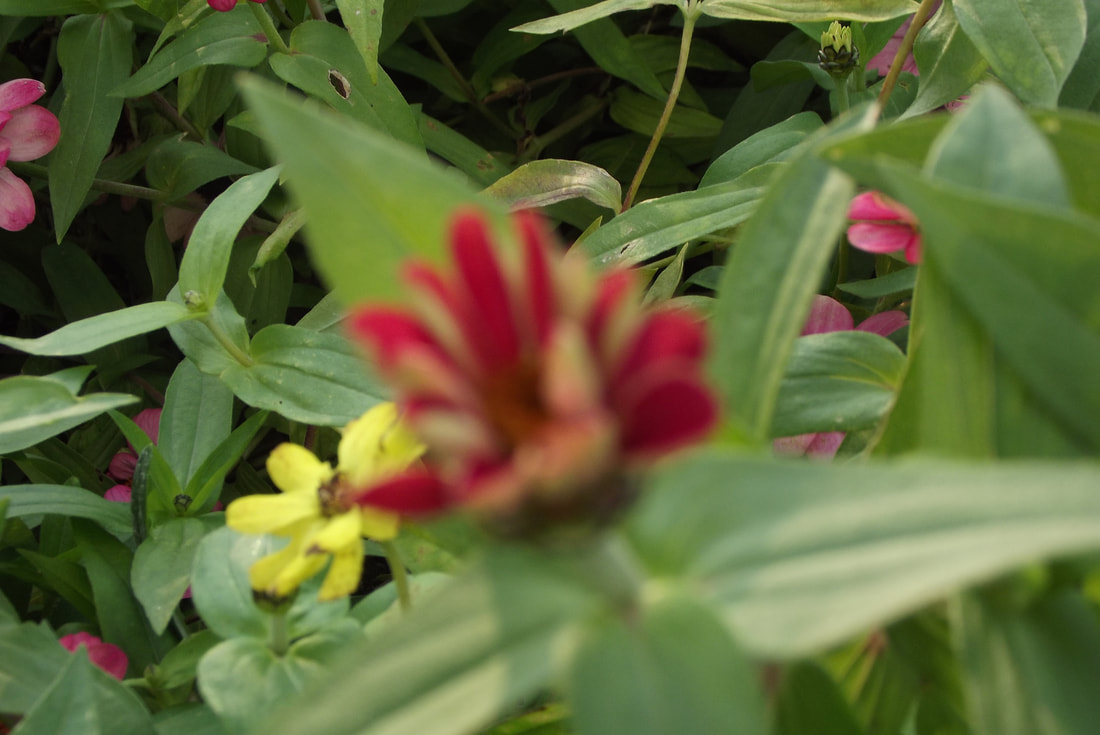
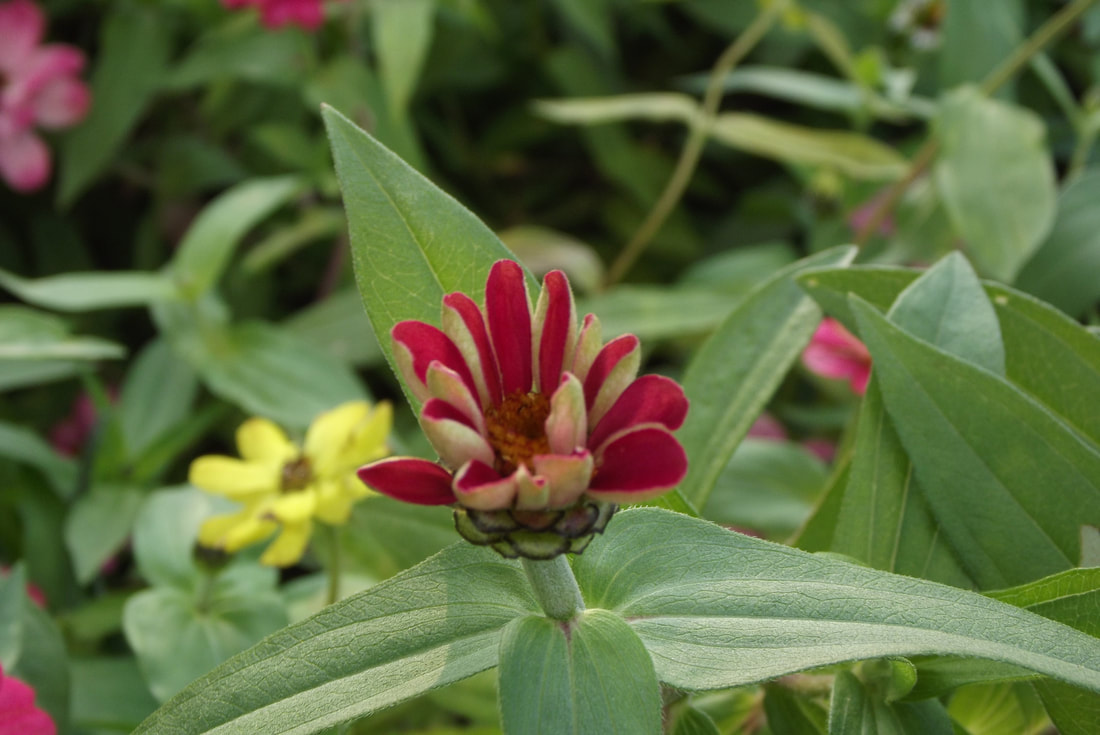
Take a look at picture #10. The camera was pointed towards the general area of the flower in the center of the frame when this picture was taken. However, the camera actually focused on the area behind the flower. This was corrected by adjusting the position of the camera and by using the focusing point(s) shown in the LCD screen so that it focused on the intended area. See picture #11
Take a look at picture #10. The camera was pointed towards the general area of the flower in the center of the frame when this picture was taken. However, the camera actually focused on the area behind the flower. This was corrected by adjusting the position of the camera and by using the focusing point(s) shown in the LCD screen so that it focused on the intended area. See picture #11
Using Flash? Generally, pictures of flowers taken in natural light look more realistic than those taken using a camera flash. Taking pictures with a flash at full power might make the image look somewhat washed out and unnatural. However, using a flash at 1/2 power in some cases might be useful for reducing the effect of dark shadows.
The Wind is not Your Friend: There may be times you will come across a beautiful flower just waiting to be photographed. Suddenly there is a slight breeze that makes the flower start swaying. The problem is that it becomes harder to focus. You can be patient and wait until the breeze subsides for a moment and then press and hold your autofocus. Then when the breeze stops again for a moment, quickly press the shutter and take the picture.
In this situation, you will want to make sure you use a fast shutter speed like 1/400 or higher. That shutter speed will freeze the motion of the flower and decrease the chance of any blur due to motion.
However, as you get closer to the flower, (lets say about a foot away) the camera lens might not be focusing on the exact area that you intended to be the focus point.
Take a look at picture #8. The camera was pointed towards the general area of the flower in the center of the frame when this picture was taken. However, the camera actually focused on the area behind the flower. This was corrected by adjusting the position of the camera and by using the focusing point(s) shown in the LCD screen so that it focused on the intended area. See picture #9
So, it is a good idea to check your camera's LCD screen frequently when taking close up pictures of flowers to make sure the camera lens is focusing on the correct area.
When taking close up pictures of flowers, it is a good idea to focus in the center of the flower that is your primary subject. That is because the depth of field can be very shallow when taking close up pictures of flowers. (the in focus area may only be a couple of inches or less)
Even if the leaves or petals around the center of the flower are not in sharp focus, you may still have a very nice picture. That is as long as the center of the flower and part of the area around it is in sharp focus. It is a good idea to check your camera's instruction book to review the focusing modes. That will give you an idea of the best focusing mode for your flower photography situation.
For those who have cameras with manual focusing in addition to auto focusing, you will find that using the manual focus option will eliminate some focusing problems when photographing flowers.
Another problem you may have when photographing flowers very close up is that the camera lens will not focus at all. That usually happens when you are closer to the subject than the camera lens minimum focusing distance. So you might have to back up or change your position to get the camera lens to focus.
Shoot From Different Angles: You can get different perspectives of the same flower(s) just by moving around a bit. A picture of a flower at ground level taken while standing or bending is fine. However, you should also try a shot or 2 from a lower perspective. That would require you to perhaps get down on one knee when shooting. Also try moving left and right. You might be surprised to see that the flower as well as background areas will look slightly different from different angles.
Macro Mode: Another option you have is to use your camera's Macro Mode. The macro mode is specifically designed for taking pictures of small objects like flowers or perhaps insects. Using the macro mode tells the camera that you are trying to take pictures at a closer than usual focusing distance.
The macro mode is usually identified on your camera by an icon picture of a flower on one of the cameras' buttons, or in the menu. The macro mode is an automatic shooting mode so the camera will take control of certain things like the aperture and shutter speed settings. Keep in mind that different lenses will have different minimum focusing distances.
Exposure Settings: The exposure settings for flower photography are basically the same as those used for photographing most other subjects. The camera lens aperture and shutter speed settings will depend on the amount of available light.
Try using shutter speeds of 1/125 second and higher if you are taking pictures of flowers without using a tripod. That will reduce the possibility of blur due to camera shake.
Depth of Field: The Depth of Field in an image refers to how much of the area around your subject or point of interest will be in focus or out of focus. Depth of field in an image will usually be referred to as deep or shallow. (deep depth of field may also be referred to as wide depth of field)
|
Flower picture #11 is an example of deep depth of field. Everything in the picture from the flower in the lower right hand area to the flowers and stems behind it have the appearance of being pretty much in focus.
Picture #12 is an example of shallow depth of field. In this picture the subject flower is in focus but the entire background area is out of focus. Many photographers like to use shallow depth of field when taking pictures of flowers because it helps to isolate the subject from anything in the background that may be distracting. |
Flower Picture #11, Deep Depth of Field
|
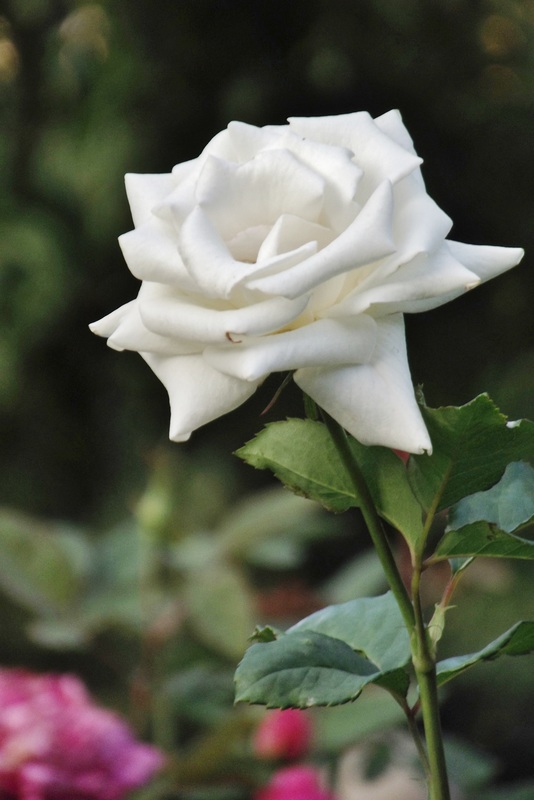
Flower Picture #12, Shallow Depth of Field
|
The depth of field in an image can be controlled to a great extent but there are several factors that influence the depth of field in an image.
Those factors would include the camera lens to subject distance, the focal length of the lens that is used, and the camera aperture setting.
The closer your camera lens is to the subject, the more shallow the depth of field will be. On the other hand, moving further away from the subject, will tend to create deeper depth of field in a picture.
Shorter focal lengths (especially on compact cameras) will tend to produce deep depth of field. It may be difficult to create very shallow depth of field when using a wide angle focal length such as 18mm unless the camera lens is very close to the subject. If you want the appearance of very shallow depth of field, it is more easily accomplished when a longer focal length is used.
Don't forget that the camera aperture setting also influences the depth of field in a picture. For more details about this subject, check the Depth of Field tutorial.
So make flower photography your next project for taking pictures. Half of the job is done since flowers are always either beautiful or interesting subjects. The next step is to put your creativity and photography skills to work as you create the next great picture of a flower. Good Luck!