What is ISO in Digital Cameras?...and When to Change an ISO Setting
The ISO setting in digital cameras is part of the camera's overall exposure system. If your pictures are coming out too dark or too light, the ISO setting can be used to lighten or darken the exposure.
Exposure is a reference as to whether an image is too light, too dark, or just right according to the photographers preferences. Take a look at the two images below.
Exposure is a reference as to whether an image is too light, too dark, or just right according to the photographers preferences. Take a look at the two images below.
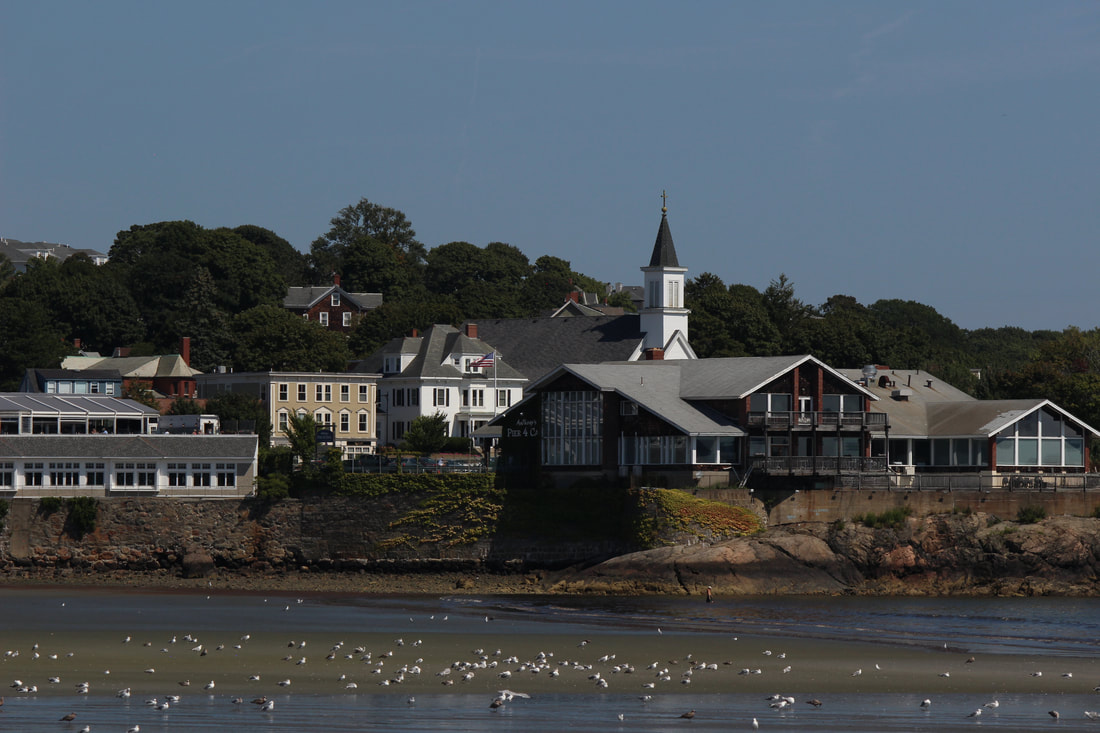
Image #1. ISO 200, F8, 1/600th Sec
|
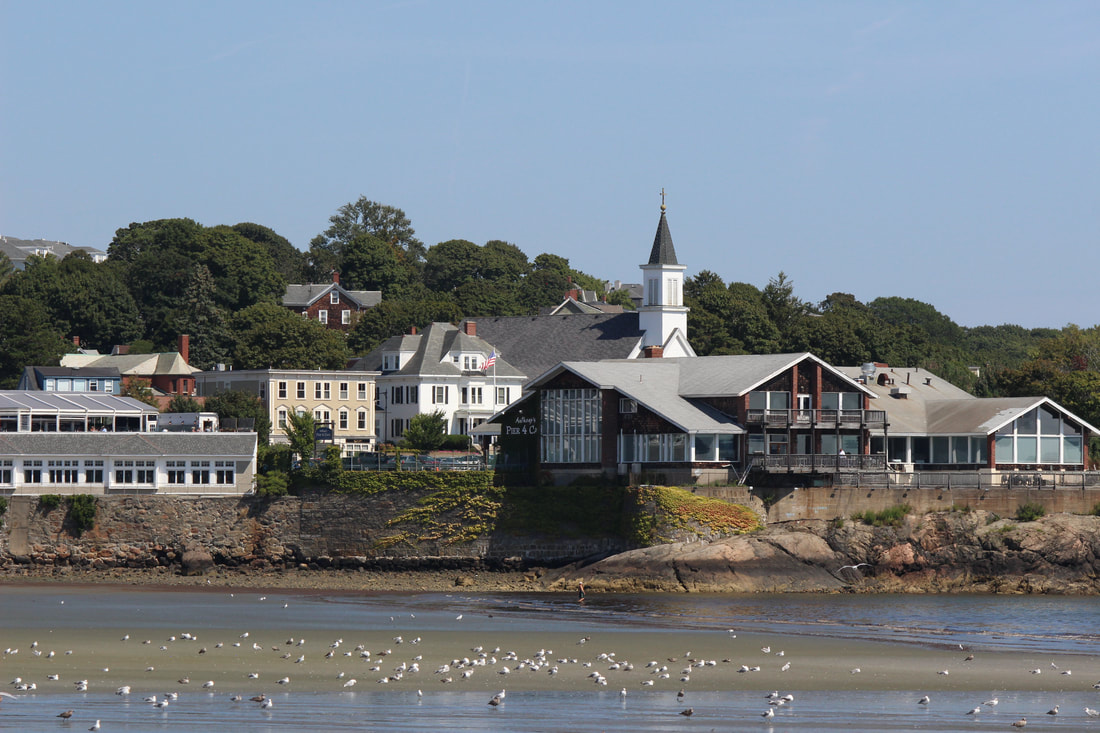
Image #2, ISO 400, F8, 1/600th Sec
|
The only camera setting that is different in these 2 pictures is the ISO setting. Picture #1 was taken at ISO 200. It is a little underexposed, (dark) so picture #2 was taken at ISO 400 and it is the better/brighter exposure.
The only camera setting that is different in these 2 pictures is the ISO setting. Picture #1 was taken at ISO 200. It is a little underexposed, (dark) so picture #2 was taken at ISO 400 and it is the better/brighter exposure.
When you set your camera to a higher numbered ISO setting, less light is needed to obtain a "correct" exposure than if the camera is set to a lower ISO number for the same shot.
The above example shows how simply changing the ISO setting can be used to lighten or darken an image.
The above example shows how simply changing the ISO setting can be used to lighten or darken an image.
Shown below is an ISO chart listing some of the ISO settings that you can use to adjust the exposure of a picture you are taking. Each larger ISO number will double the brightness of light in an image compared to the lower number next to it. On the other hand, using the next lower ISO number will decrease the brightness of an image by 1/2.
64 |
100 |
200 |
400 |
800 |
1600 |
3200 |
6400 |
12800 |
(The ISO settings shown above are known as "stops". You will probably see stops of 1/3 or 1/2 increments between the above listed ISO stops in your camera. For simplicity, only the full stops are listed in the above chart)
(The ISO settings shown above are known as "stops". You will probably see stops of 1/3 or 1/2 increments between the above listed ISO stops in your camera. For simplicity, only the full stops are listed in the above chart)
(The term ISO stands for International Organization for Standardization. This is an organization that has set standards for many products in various industries. In the days of film cameras, it labeled the light sensitivity of different films as ASA 100, ASA 400, etc. Similiar ratings have carried over to the digital camera era using the term ISO instead of ASA)
Beyond using the ISO setting to change how light or dark an image is, the ISO setting can often be used to allow the photographer to change their Shutter Speeds and/or Lens Aperture settings to achieve the exposure effect they want.
For instance, the Shutter Speed affects the look of motion in an image (blurred or frozen) and the Lens Aperture setting affects the Depth of Field (how much of the foreground, background and subject are in focus) in an image.
Please read Camera Exposure Basics for more on that subject.
For instance, the Shutter Speed affects the look of motion in an image (blurred or frozen) and the Lens Aperture setting affects the Depth of Field (how much of the foreground, background and subject are in focus) in an image.
Please read Camera Exposure Basics for more on that subject.
When to change the ISO Setting: Lets say you are trying to shoot a fast moving subject like a car on the highway and your camera is set on ISO 200. Your camera's exposure metering system may indicate that a lens aperture setting of F3.5 along with a shutter speed of 1/125 will produce a correctly exposed image.
However, the shutter speed 1/125 second probably won't be fast enough to "freeze" the movement of the car. (fast moving subjects might be blurred in an image when you are using slower shutter speeds).
The best way to solve the problem is to start by changing your ISO setting from ISO 200 to ISO 400. You will then be able to increase your shutter speed from 1/125 second to 1/250 second as you attempt to get a properly exposed image that is not blurred.
If that shutter speed of 1/250 isn't fast enough, change from ISO 400 to ISO 800. Then increase the shutter speed from 1/250 to 1/500 second. (let's assume that the shutter speed of 1/500 is fast enough to "freeze" the action). You will then have a nicely exposed image without any blur in it.
There also may be times that you might want to change the ISO setting if you want to use a specific lens aperture opening instead of adjusting the shutter speed. The same principle that was just used with the ISO and shutter speed combination can be used the same way with the lens aperture and ISO settings.
Keep in mind that each of the adjustments made to the ISO setting and the shutter speeds in the example above are equal steps/stops. That way, the correct exposure will be maintained.
Please take a look at Camera Exposure Basics for more on this subject.
FYI, just so you know: Whereas changing your camera's shutter speed or lens aperture setting will allow more, or less light to flow through the camera lens to reach the camera image sensor, the ISO setting works differently.
Changing the ISO setting does not affect the amount of light that reaches the image sensor through the camera lens. Instead, changing the ISO setting will send an electrical charge to the image sensor that will increase or decrease the brightness of any image regardless of the actual amount of light in a scene.
Changing the ISO setting does not affect the amount of light that reaches the image sensor through the camera lens. Instead, changing the ISO setting will send an electrical charge to the image sensor that will increase or decrease the brightness of any image regardless of the actual amount of light in a scene.
The results of this increase or decrease in the ISO number setting is commonly referred to as an increase/decrease to the image sensor's "sensitivity" to light.
Digital Camera Noise/Lower ISO numbers are better: While it is a great thing to be able to increase your camera's ISO number in order to get the shot you want, there is a down side to doing it. The down side is called "digital camera noise"
The higher your ISO setting, the more noise you may see in your picture. Noise is tiny dots or specks in the image that are generated when a high ISO number is chosen and the image sensor is amplified to produce a brighter image.
The higher your ISO setting, the more noise you may see in your picture. Noise is tiny dots or specks in the image that are generated when a high ISO number is chosen and the image sensor is amplified to produce a brighter image.
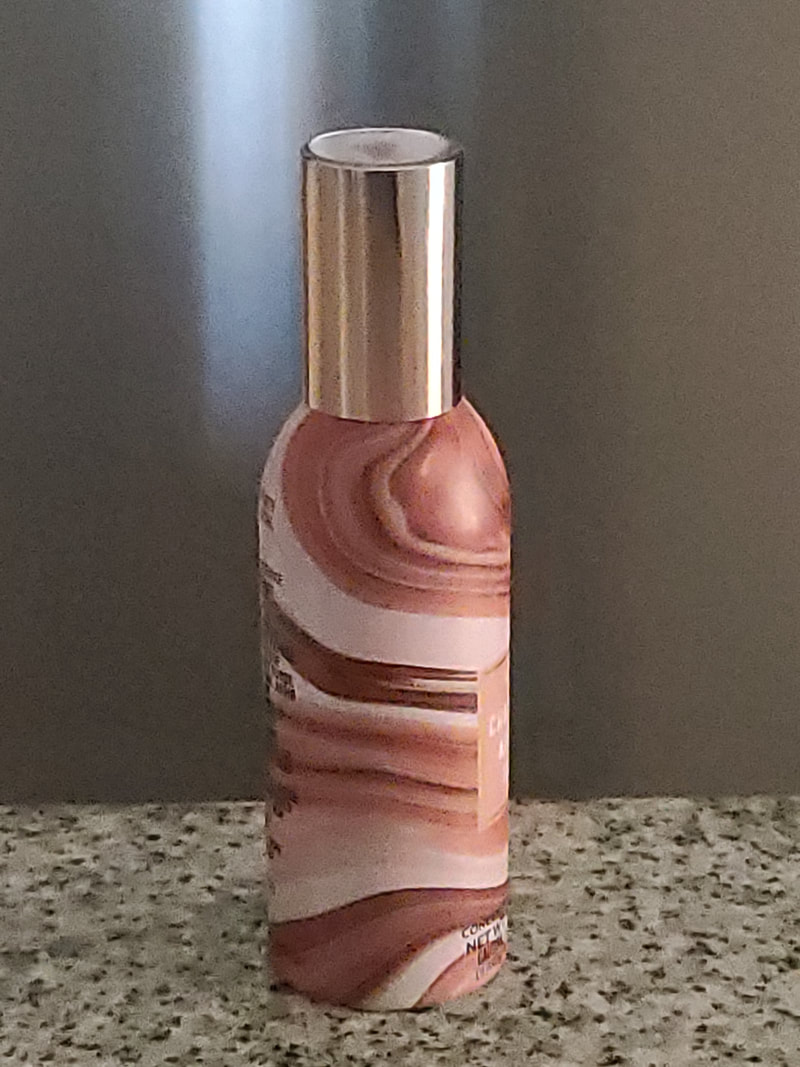
ISO Image #3, ISO 3200, F 1.8, 1/800 Sec. Shows visible noise. (Click to Enlarge)
|
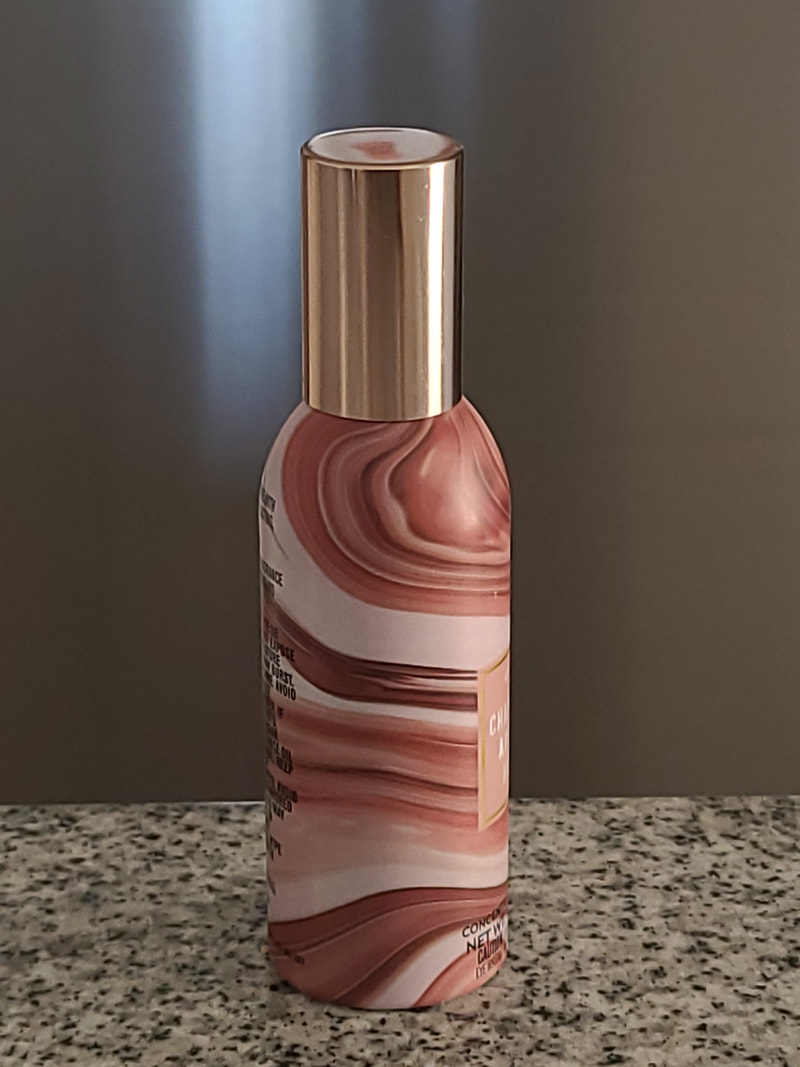
ISO Image #4, ISO 100, F 1.8, 1/30 Sec. Shows no visible noise. (Click to Enlarge)
|
Images #3 and #4 were taken with a smart phone camera. Upon close inspection, you can see that image #3 is exhibiting the previously mentioned digital camera noise. (especially on the spray container. That image was taken at ISO 3200 which is a relatively high ISO number for a smart phone camera. Image #4 was taken with the same camera but does not show the same digital camera noise.
That is because image #4 was taken using ISO 100 and most images taken at a low ISO number like ISO 100 will not exhibit much visible noise. Please note that even though the ISO settings are different in the examples above, the correct exposure was maintained. That was accomplished by adjusting the shutter speed by the same amount of stops as the increase/decrease of the ISO setting.
It is important that you realize that all digital images contain some noise. If you were to greatly enlarge image #4 you would begin to see noise in that image as well. However, the noise would not be as much as the noise in image #3.
The good news about digital camera noise is that modern technology has advanced to the point where most cameras can now produce images with minimal amounts of noise. However, please note that cameras with smaller image sensors and pixels like compacts and cell phones will tend to produce images with more noise than Digital Single Lens Reflex cameras and Mirrorless cameras. (which have larger image sensors and pixels}
Automatic and Manual ISO Settings: When you use your camera in the fully automatic mode, the ISO number may be automatically set for you. The ISO number that the camera chooses will depend upon the amount of available light. It will also depend on any automatic scene mode you have set such as night, sports, or portrait.
In any case, even when a camera is set to an automatic scene mode, it will try to use the best settings for the light in a chosen scene. That will include the most reasonable ISO setting, shutter speed and aperture setting that will produce a well exposed image.
In any case, even when a camera is set to an automatic scene mode, it will try to use the best settings for the light in a chosen scene. That will include the most reasonable ISO setting, shutter speed and aperture setting that will produce a well exposed image.
When should the ISO setting be changed? Pictures #1 and #2 shown previously in this tutorial are a simple example of how a picture can be made lighter or darker just by changing the ISO setting. That example would apply when the lens aperture setting and the shutter speed setting are not the most important thing affecting your image.
However, you need to remember that the camera shutter speed and lens aperture setting can affect the look of your final image.
In any case, always remember that adjusting the ISO setting may save the day when the shutter speed and aperture settings are not producing the exposure you may want for your image.
So now, the question what is ISO?, has been answered and hopefully you will be able to use this information when making decisions about exposure settings for you images.