Digital Camera White Balance and Color Temperature
Most of us have seen or taken a picture that came out with a yellowish, bluish, or green tint that wasn't visible in the actual scene when the picture was taken. Those tints or color casts are directly related to the "color temperature" of the light source. Those tints can be corrected by adjusting your cameras' white balance setting.
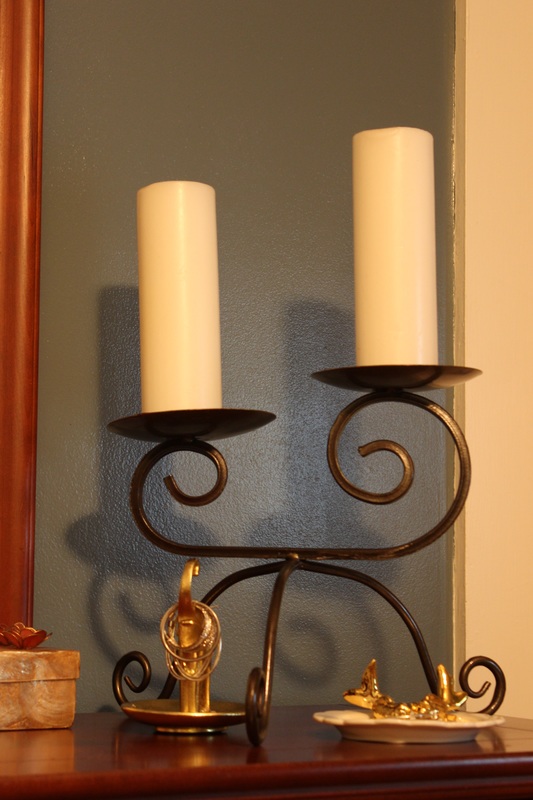
For instance, the two images shown below were taken indoors with an everyday tungsten light bulb as the light source. You can clearly see the difference in the overall color tone of the pictures. The image on the left has a yellowish tint caused by the tungsten light source. The auto white balance function was used with the image on the right. The yellowish tint has been eliminated and the color looks more natural.
For instance, the two images shown below were taken indoors with an everyday tungsten light bulb as the light source. You can clearly see the difference in the overall color tone of the pictures. The image on the left has a yellowish tint caused by the tungsten light source. The auto white balance function was used with the image on the right. The yellowish tint has been eliminated and the color looks more natural.
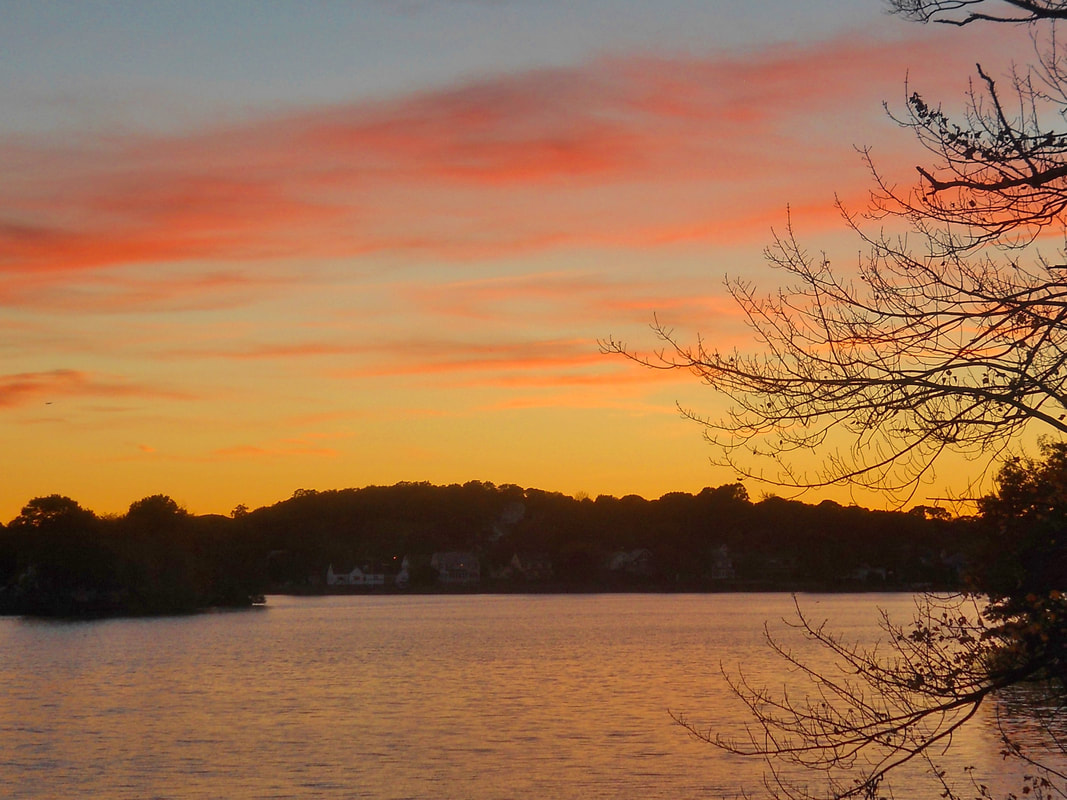
Photo taken with a tungsten bulb light source and no White Balance adjustment
|
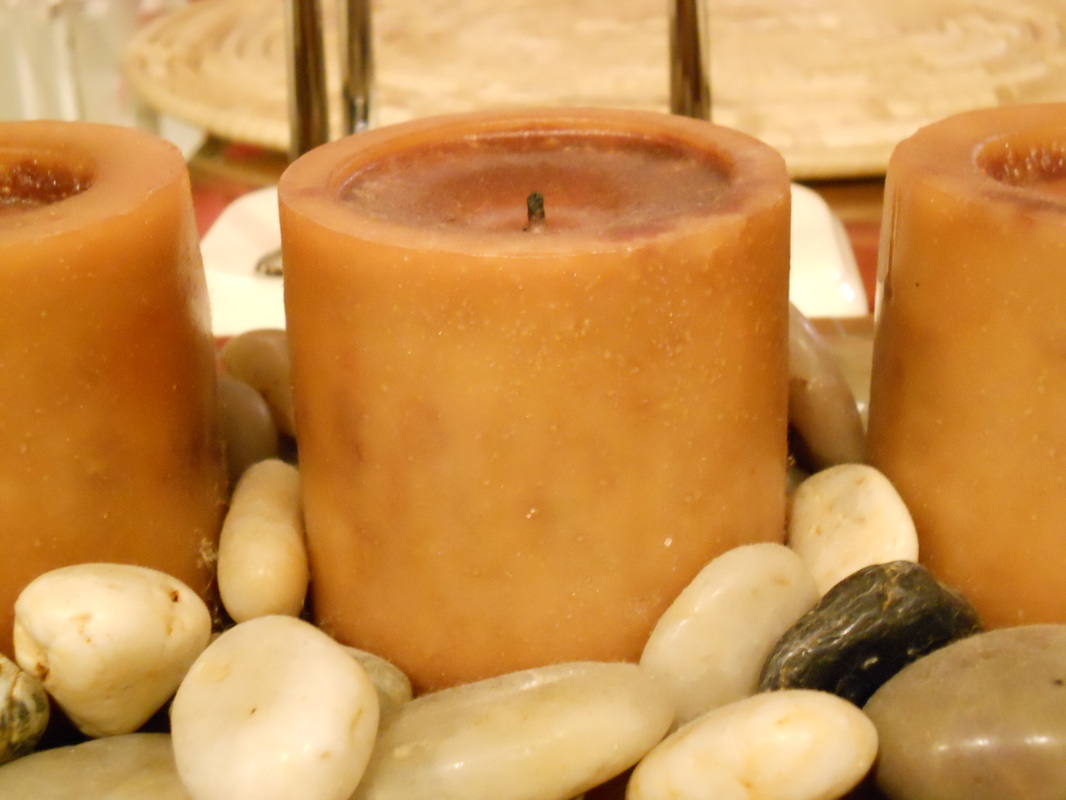
Photo taken with tungsten bulb light source using Automatic White Balance feature
|
All digital cameras are equipped the White Balance (WB), or Automatic White Balance (AWB) function. Most of the time, using your cameras' Automatic White Balance feature will keep those undesired color casts from showing up in your pictures.
How Does White Balancing Work?: White balancing is a process that removes unwanted color tints from an image. When the white balance function is used, the camera tries to identify something white in a scene and then reproduces the white as our eyes see it. (without an incorrect color cast)
During the white balancing process, the color tint that is preventing the white in the picture from showing as true white is eliminated from the entire image. That type of color adjustment is done based on the assumption that if the white in a scene is recorded correctly as white, then the rest of the colors in the image will also be recorded as their true color.
How to set White Balance: Your camera has white balance settings (pre sets) that are designed to match the lighting conditions under which you are taking pictures. The most common settings for white balance in digital cameras are Automatic, Daylight/Clear, Cloudy, Shade, Incandescent light (or tungsten), Fluorescent light, and Electronic Flash.
Locate the white balance mode in your cameras' menu and take a shot using the Automatic White Balance setting. This setting will usually eliminate any unwanted color casts from your images under most lighting conditions. So most of the time you won't have to make any further adjustments when the camera is set to Automatic White Balance.
However, if you do have an unwanted tint in your picture, take note of the light source and change your white balance setting to match the lighting conditions.
For example, if you are taking pictures under fluorescent lights and there is a greenish color cast in the image, change the white balance setting to fluorescent light. If you are taking pictures indoors and incandescent/tungsten light bulbs are the main light source, your pictures will have a yellowish tint. Just change the white balance setting to tungsten and most of the off color tint will be eliminated.
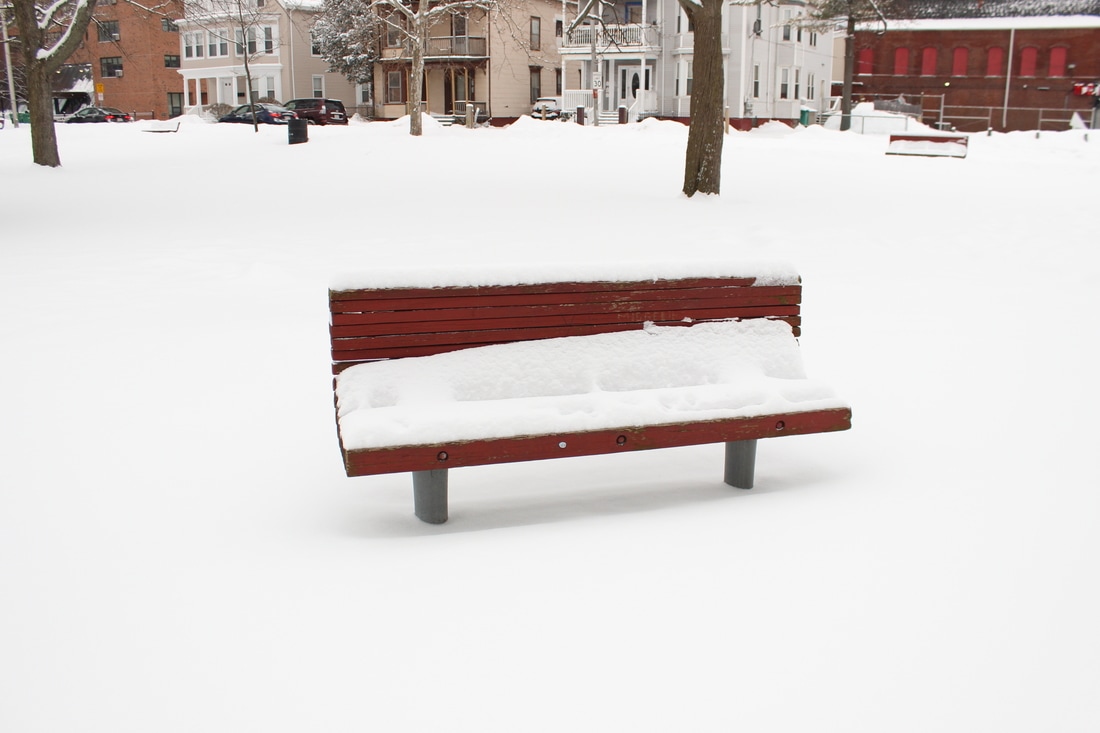
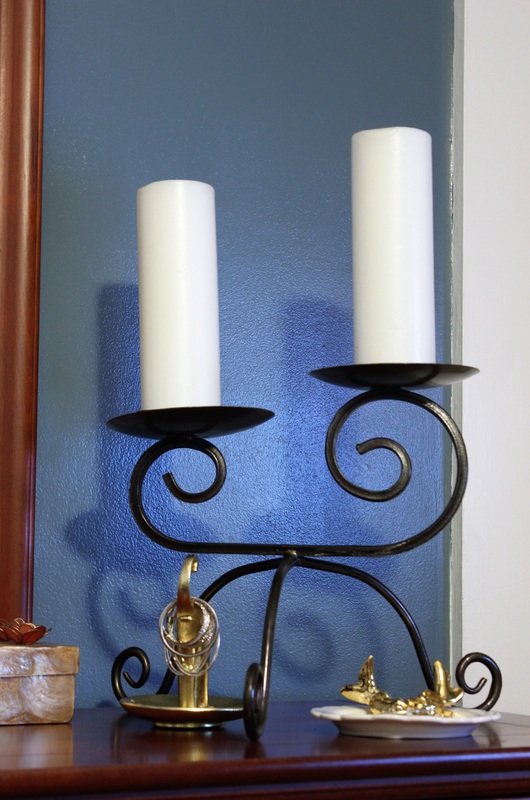
The picture on the left below was taken with a white balance setting of Daylight. You can see that there is bluish tint in the image. The picture on the right was taken using the Shade white balance setting which eliminated the bluish color cast from the image.
For the record, the pictures were actually taken on a heavily overcast day. You will understand why the Shade white balance setting was used for this situation after reading about color temperature.

Picture taken with White Balance set to Daylight/Clear
|
Picture taken with White Balance set to Shade
|
Color Temperature: Now that you understand the white balance function, it may be useful for you to take a closer look at what causes those "off color" tints in some images.
The color tints in any image are directly related to the color temperature of the light. Some light is considered to be "warm" while other light is considered to be "cool".
At one end of the color spectrum, reds are considered to have a low (warm) color temperature. At the other end of the color spectrum, blues have a high (cool) color temperature. The rest of the colors fall somewhere in between.
Please note that color temperatures are not a reference to hot or cold as far as our touch or our senses. It refers to the intensity of the light. For example, the intensity of the light during a morning sunrise is not as strong as the light at mid-day, even if it is a cloudy, overcast day.
Light temperature is measured according to degrees on what is called the Kelvin Scale. Higher light color temperatures will record in photo images with a bluish tint. Lower light color temperatures will record in images with a reddish/orange tint. (that is, in certain situations when the white balance function is not used)
The color temperature chart below shows the approximate color temperatures of light sources that we see and use every day.
Source of Light |
Color Temperature |
Candlelight |
1,000 to 2,000k (Kelvin) |
Tungsten Bulb/Incandescent |
2,500 to 3,000k |
Sunrise/Sunset (Clear Day) |
3,000-4,000k |
Florescent Light |
4,000-5,000k |
Electronic Flash |
5,000-5,500k |
Clear Day, Sun Above |
5,000-6,500k |
Slightly Overcast Day |
6,500-8,000k |
Heavily Overcast or Shade |
9,000-10000k |
Notice that the temperature chart shows that the highest color temperature is associated with an overcast day. There is more of a bluish tone in the atmosphere on an overcast day. That is why the picture in the previous example had a very bluish tint on the snow.
Tungsten bulbs give off light with a much lower color temperature. Any off color tint due to that type of lighting will be yellowish.
Please note that an electronic flash is designed to have a color temperature similar to that of average daylight with no clouds.
Our eyes and brain work together so that we will usually see white as white no matter what the light conditions are. However, digital camera image sensors record colors strictly according to the temperature of the light. (along with the color tint associated with the color temperature)
So digital cameras are equipped with the white balance function to make the color tones in the image look more natural.
Custom White Balance: There may be times when there is nothing in a scene that can be clearly identified as white (or neutral). This may prevent the cameras' sensor from locating a "Point of Reference" thereby increasing the chances that the color tones of the light will be recorded incorrectly.
Then there may be cases when there is something white in the scene but the lighting still throws off the overall color tone.
The picture below on the left has too much of a yellowish tone due to the light source being a tungsten light bulb. The picture was taken using the Automatic White Balance setting.
In cases when the available white balance settings don't produce the correct color tone in your images, try using your camera's Custom White Balance setting.
The picture on the right was taken after the white balance setting was changed to "Custom". The yellowish off color tint has been eliminated and the overall color tone is closer to the actual colors in the scene.
Picture taken using Automatic
White Balance
but still has an off color tint
|
Picture taken after Custom White Balance feature was used
|
The procedure for using custom white balance will require you to first take a picture of something that is white. Take a picture of a pure white piece of paper or cardboard under the lighting conditions you will be shooting in. If necessary, adjust the camera exposure settings to make sure the white is exposed correctly. (it shouldn't look grayish)
Make sure to fill the entire frame with the white paper. Your camera may not be able to focus on a flat white piece of paper but the picture doesn't have to be in focus. It just needs to be white.
Next, go into your cameras' menu and find the Custom White Balance setting. You will then be asked to to choose an image for the custom white balance setting. Choose the picture of the white paper that you just took. This will tell your camera what white should look like under the current lighting conditions.
Any shots you take going forward should be pretty much free of unwanted color tints. That is as long as you continue taking pictures under the same light conditions. Just remember to repeat the procedure or change your white balance settings when the light conditions change.
(A neutral gray card or object which reflects 18% of the light that falls on it can also be used for custom white balance. Neutral gray cards can be found in your local photo store. If you don't have an 18% neutral gray card , you can try using some other light gray object with a flat smooth surface. However, your results might not be as accurate)
It is probably a good idea to check your camera's instructions for using Custom White balance. The procedure should be pretty similar to what was mentioned above but different cameras might have slight differences in reaching the same results.
Hopefully, the next time your images are not coming out the way you want as far as color tone, you will be able to quickly adjust the camera white balance setting and keep on shooting!